Navlang 用户手册
navlang - DSL for automatically navigating around inside web applications using visual analysis
Navlang Syntax
Comments
Any lines starting with # (or spaces followed by #) are treated as code comments and will be discarded by the compiler.
For example:
# this is a comment
    # so is this line...
Comments must be on its own lines according to the current implementation.
We also support the block comment syntax, #{ ... }, which can span multiple lines, as in
#{
    This is a
    multi-line
    comment...
}
You can specify double or tripple curly brackets to disambiguate special cases
where the } character is used in the contents being commented out via the block comment
syntax, as in
#{{
    This is a block comment
    containing #{ ... }
}}
Sections
Each navlang program usually specifies one or more sections to declare how the current web page should look like and how to locate the page elements accurately for various operations.
Unlike traditional Web UI end-to-end (e2e) testing techniques, we never use CSS selectors or XPath queries to locate page elements, but just use visual information. It is always a shame to require test writers to check out the HTML source code or inspect an element via web browsers' developer tools to write any test scripts.
All the section values must take at least one level of indentation.
elems
This section specifies the qualitative visual layout of the interested web page elements as well as their notable neighbors.
Each page element is enclosed in a pair of square brackets ([]) and has the following format:
[Type Label]=ID
or just
[Type Label]
Available element types
The Type part can take one of the following values
TextboxLinkButtonLabelTitleTextImageCheckboxRadioToggleDropdownOptionFileCodeMirror
And the Label part specifies the pattern for the string label associated with the element.
Right now, only literal string patterns are supported, as in
[Textbox "User Name"]

[Link 'Delete']
[Title /[a-z]\d+/]
The following escaping sequences are allowed in the double-quoted or single-quoted literal strings:
\a
\b
\e
\f
\n
\r
\t
\"
\'
\\
The regex patterns will first attempt a full string match (or an anchored match), and then try a partial match instead.
The label can be empty string, [Textbox ""] meaning that Textbox with no label
will match it.
The label can also be empty regex //, [Textbox //] meaning that Textbox may
or may not have the label.
The =ID part defines an ID for the current page element, which can be used to reference
the same page element in the subsequent commands, as in
elems:
    [Button "Create User"]=create

click -> create   # click on the element of the ID "create"
The =ID specifier is optional and be omitted when no later references are needed.
If an element is specified with an ID, it can be referenced in the next elems
block using [=ID]. For example, to select an option in a dropdown list:
elems:
    [Dropdown "Please select action type"]=select-action

click -> select-action

elems:
    [=select-action]
    [Option "Redirect"]=redirect

click -> redirect
Toggle
Currently we will take a <label> as a Toggle when:
- It contains or points to a hidden
<input type="checkbox"> - It must display as a block
- It must do not have brothers with same height
And the label in [Toggle "some toggle"] will be compared with <input type="checkbox">’s name.
CodeMirror
Currently we will take a <textarea> + <div> as a CodeMirror when:
<textarea>is hidden<div>is visible and has the class ‘.CodeMirror’
Quantifiers
The elems label can also takes quantifiers like (?). For example, the following section
allows the element pattern layout match to fail:
elems(?):
    [Title   "Domain"] [Title "Label"]
    [Link "test2.com"] [Label "Test application"]   [Link "Delete"]=delete

found:
    click -> delete
In this example, only when the test2.com link is found with its specified neighbors, it
clicks on the element link with the ID delete.
Basically, elems(?) can be used with the found and not-found label sections to do
branching.
Another valid quantifier is a time with a unit “s” or “ms”, which indicates that Navlang will search for the elements layout repeatedly for a max wait time as specified in the quantifier. For example,
elems(3s):
    ![Button "No display btn1"]
    [Button "btn2"]=btn2
    ![Button "No display btn3"]

click -> btn2
The timeout for this example is 3 seconds. Navlang will search for this layout repeated in a small interval. As long as the layout is found, it will process. If the layout is not found after 3 seconds, it will throw out error.
Since latest upgrade, Navlang will take NAVLANG_MAX_WAIT as default retry
time limit. If you don’t want Navlang to retry automatically, you can turn it
off with setting the environment variable NAVLANG_RETRY_ELEMS=0.
You can also use a combination of two quantifiers, like (?)(3s),
or (3s)(?), which means: search for this layout repeatedly within 3 seconds,
and then go to the different branch according to the result of the last search.
Reserved words
Please be careful, we use some words as “Reserved words” and they cannot be used for element ids. Currently, they are
stdoutstderrstatus- and the words above with a number suffix, like
stdout1,stderr2, etc. We use them to store the results of multiple commands.
Negation of elements
We can add the ! prefix operator to each element to assert that this element
should not exist on the page. For example,
elems:
    ![Textbox "Name"]
This would fail to match when the Textbox element with the label Name does
exist on the current page.
Context-sensitive negation support is still a TODO.
Search elements with status
For Checkbox, Radio, and Toggle elements, you can search them with both
their label and status. Like this:
elems:
    [Checkbox "Checkbox" on]
    [Radio "Radio" off]
    [Toggle "Enable" on]
found
This section is usually used with an earlier elems(?) section to specify commands in
the fall through branch (i.e., when the elems(?) actually matches the elements.
not-found
This section is usually used with an earlier elems(?) section to specify commands in
the jump-out branch (i.e., when the elems(?) does not match anything).
desc
This section is used to embed markdown descriptions with screenshots
when --gen-doc option is specified. For example, consider this sample.nav file:
goto URL
desc:
    Here is the home site of **Some Thing**.
To generate the document, we first compile it using --gen-doc like:
./navlang --gen-doc sample.nav
The window size of the Chromium can be set by using ---window-size like:
./navlang --gen-doc --window-size=1200x800 sample.nav
The default window size is 800x600 pixels. You can also use the environment
variable NAVLANG_WINDOW_SIZE to configure it.
Then run the output JavaScript file, node sample.js, we will get the markdown
file sample.md. The markdown output is like this:
Here is the home site of **Some Thing**.
To generate HTML file
If you want to generate HTML file from markdown file, you need to install marked by npm install marked.
Then use the script gen-html.js like this:
$ node gen-html.js sample.md
sample.html is ready.
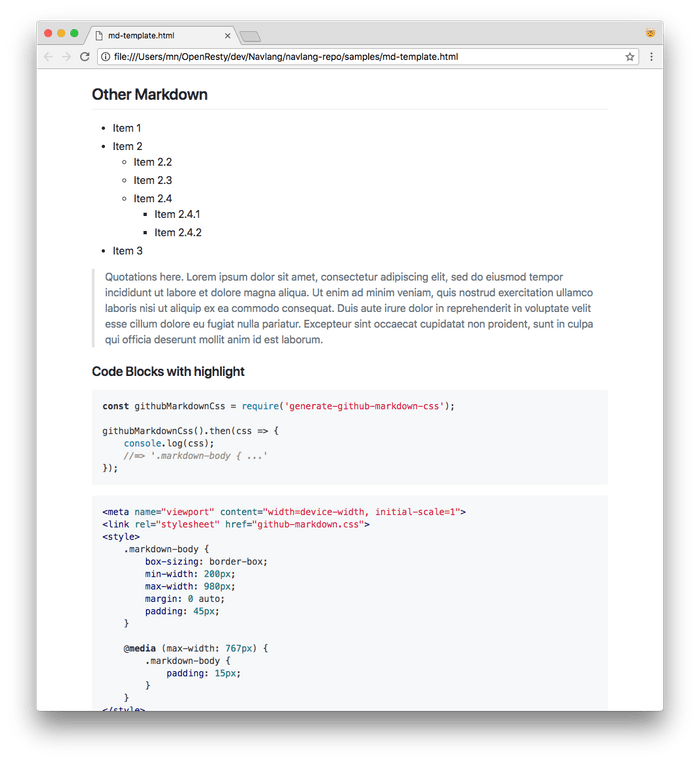
It will output the html file with GitHub style. Here is an example:
To generate video
If you are generating video, contents in desc section will be converted to
speech, and attached to other operations before or after.
For example, consider a Navlang snippet like this:
desc:
    Hi, there, here is a example

goto 'https://openresty.com'
In the generated video, the first step is openning https://openresty.com,
at the same time, the speech “Hi, there, here is a example” will be played.
We currently support two types of desc, one is like the example above;
the other one is used to make explanation after some operations are completed.
To use the second type, you can add (sync)(or (s) for short) quant, like:
desc:
    OK, let's begin

goto 'https://openresty.com'

desc(s):
    That's all, thanks
desc sections with same type will be merged, so the following two code snippets
are equivalent:
# separated
desc:
    OK, let's begin

desc:
    Hello, there

desc:
    Nice to meet you

# equal to
desc:
    OK, let's begin
    Hello, there
    Nice to meet you
You can add async quant to emphasize the type of desc secion,
but most of the time it can be omitted because the default type is async.
Please note that, if a desc section is located at the end of code,
then it must be sync.
To insert external video
If you are using screenplay.pl, want to embed an external video, but use Navlang to generate audio commentary, you can do so:
d(video=a.mp4):
    some commentary you want to make
In this way, Navlang will extract the video portion from the external video
file and embed it into the desc location, along with the audio commentary.
To insert external image
If you are using screenplay.pl, want to embed an external image, with Navlang to generate audio commentary, you can do so:
d(image=a.webp):
    some commentary you want to make
In this way, Navlang will use the image to generate pure video, and embed it
into the desc location, along with the audio commentary.
To highlight text
You can use OCR to highlight some texts in current screen.
d(highlight=text):
    some commentary you want to say with highlighting `text`
In this way, Navlang will try to analyse current screen with OCR, find text
and highlight it.
Abbreviated form
We provide some abbreviated form for you to accelerate your development.
d:=desc:ds:,d(sync):=desc(sync):d(async):=desc(async):di=a.webp=d(image=a.webp)dv=a.mp4=d(video=a.mp4)dh=hello world=d(highlight=hello world)
loc
This section specifies the relative location on a whole web page for the element
layout specification
in a subsequent elems section. We use the X mark for the
placeholder for the positions hold
by an interested page element, while using - to identify the uninterested background space. Below
is an example:
loc:
    --------
    XXX-----
    XXX-----
    XXX-----
    --------

elems:
    [Title "Login"]
    [Textbox "User Name"]=user
    [Textbox "Password"]=pass
    [Checkbox "Remember Me"]=remem
    [Button "Login"]=login
This indicates that the element group specified under the elems section should be
on the left hand side part of the whole page.
The loc section is optional and can be omitted.
Note: the loc section has not yet been fully implemented.
shell
Executes commands via shell. One line at a time, unless ending with \.
Normal output will go to stdout, warnings and errors will go to stderr.
You can check them through åthese variables.
After all commands are executed, you can check the result like this:
shell:
    echo 'hello'

stdout is 'hello'
stdout eq 'hello'
# here, `is` has the same feature with `eq`
or check stderr output like this:
shell:
    helloworld

stderr contains /helloworld:( command)? not found/
status eq '127'
# error message contains the line number and file name, so it is better to use
# a regexp matching.
For multiple commands in a single shell section, Navlang will save all of
their stdout, stderr and status values in separated variables,
so that you can check them by adding an index number at the end of the names,
like this:
shell:
    echo 'hello'
    echo 'world'
    meathill

stdout1 is 'hello'
# in this case `stdout` and `stdout1` are equivalent
stdout2 is 'world'
stderr3 contains /meathill:( command)? not found/
status3 eq '127'
The index number starts from 1. stdout1 is equivalent to stdout, stderr1
is equivalent to stderr, and status1 is equivalent to status.
If a command line ends with \, then this line will be continued to the next
line to form a single command for executing. For example:
shell:
    echo 'hello \
        world'

stdout is 'hello \nworld'
# spaces at the beginning of the next line will be ignored.
Commands and result output to markdown
If the shell section is surrounded by capture begin/end pair, the commands
inside shell section and the output of the commands will be output to the
markdown content if --gen-doc is enabled. For example:
capture begin

shell:
    echo 'hello'
    echo 'world'

capture end

desc:
    Let's use the classic example.
This will generate a markdown file:
```bash
$ echo 'hello'
hello
$ echo 'world'
world
```

Let's use the classic example.
dialog
This section is used to match browser dialog like alert, confirm, prompt,
and beforeunload. For example, consider capturing confirm() in
sample.nav:
dialog:
    [Confirm "Are you sure?"]=confirm

accept -> confirm
# dismiss -> confirm
accept means clicking ‘OK’, while dismiss means clicking ‘Cancel’.
You need to handle all captured dialogs, different dialogs have different
behaviors. BeforeUnload is the same with Confirm, will not be described
again.
For Alert, accept and dismiss means the same operation.
# alert
dialog:
    [Alert "hello world"]=alert
accept -> alert
# or dismiss -> alert
For prompt, you could input a string to the dialog, and then the dialog
will be auto accepted. And you can check the default value of the prompt
dialog by using eq, contains, like a Textbox.
# prompt
dialog:
    [Prompt "Please input your name"]=prompt

prompt eq 'openresty'

'OpenResty' -> prompt
# or dismiss -> prompt
Notice: you should capture one dialog and handle it immediately. More than one dialog in one section will cause error.
mock HTTP
This section will define an HTTP request for mocking. Generally, it contains
two sub-sections, req and resp. Under the req section, the request method,
URL, headers and body can be specified. Under the resp section, the response
status, headers and body can be specified.
Here is a full example:
mock http:
    req:
        POST /admin/login/          # METHOD URL
        x-header-1: hello           # REQ-HEADER-NAME: REQ-HEADER-VALUE
                                    # a blank line separates header & body
        {'aa': 0}                   # REQ-BODY-STRING

    resp:
        200 OK                      # STATUS-LINE
        x-header-2: world           # RESP-HEADER-NAME: RESP-HEADER-VALUE
                                    # a blank line separates header & body
        {code: 0, msg: 'ok'}        # RESP-BODY-STRING

unmock http
METHOD URLdefines method and URL you want to mock.- Currently, we support
GET,POST,OPTIONS,PUT,PATCH,DELETE. - The
URLcan contain RegExp pattern, e.g.http://test.mydomain.com/api/(\d+)will match forhttp://test.mydomain.com/api/123request.
- Currently, we support
- Other headers/body can be specified through
KEY: NAMEformat.- To avoid Cross-Origin Resource Sharing (CORS) issue, header
Access-Control-Allow-Origin: *is added to response header by default.
- To avoid Cross-Origin Resource Sharing (CORS) issue, header
- Response status code is default to 200.
unmock httpwill remove all the mock HTTP requests.
Header parts and body parts are not required for the mock HTTP requests. For example:
mock http:
    req:
        GET /user/msg/

    resp:
        200 OK

        {code: 0, msg: 'ok'}
video
With screenplay.pl, you can fully embed an external video into a
Navlang-generated video by using video=xxx.mp4, where xxx.mp4
is the path to your video file.
term
Termlang is another language for describing terminal operations, you can embed Termlang snippets into Navlang script. It is very useful when we need to show command line operations.
By default, Navlang will just export standalone Termlang files (which will be named by filename and line number), and then proceeds to execute next Navlang code.
On the other hand, when --target is set to video or web, or
--term-variables is set, then Navlang will wait for term: section to be
executed.
If you want to reference the previous regexp captures in term: section,
please use the $* as prefix, like using external variables, not $ as usual.
For example:
e:
    [Text /hello, (.+)/]

term:
    $*1
Commands
Navlang supports the following commands:
lang LANGUAGE
Forcefully set the default language of browser.
lang "en"
goto URL
Goto the URL specified.
goto "https://openresty.com"
If the target site has basic authentication enabled, you can add the user and pass parameters after the url.
goto "https://basic-auth.com" user=USER pass=PASS
If there is another url inside the target site need basic authentication, you can
add an extra parameter url to specify.
goto "https://some-url.com" user=USER pass=PASS URL="basic-auth.com"
click -> ID
Emits a click event to the element of the id ID. For example,
elems:
    [Button "Login"]=login

click -> login
stop
Stops the execution of the navlang program and leaves the web browser as is. When highlight is enabled, the last highlighted elements will display again.
exit
Exits the processing without running any subsequent commands.
Unlike the stop command, this quits the web browser and everything.
warn MESSAGE
Prints the value of MESSAGE to stderr. MESSAGE should be quoted and
Navlang will treat everything in MESSAGE as a pure string to show.
warn
# Warning: something's wrong at line 1, a.nav.

warn "hello"
# "hello" at line 1, a.nav.

warn "hello\n"
# hello

warn hello world
# invalid argument syntax for "warn"
refresh
Reloads the current web page.
wait network
Waits for the network to be idle.
sleep TIME
Sleep for TIME. TIME is a number with time unit “s” or “ms”.
The number could be an integer or a decimal, like 1, 5, 0.5, 12.5, etc.
Sometimes we need to wait for an animation to finish playing,
then you can use this command.
STRING -> ID, STRING ->> ID, STRING => ID
Enters the text STRING into the input element of the id ID.
Note that when the element is <select> element, this command can
select the <option> which has the label as STRING, not the value
attribute of option.
If the element is File, this can also be used to select the files by
file paths. For example,
elems:
    [File "Upload"]=file
"a.html" -> file
To select multiple files, use this:
elems:
    [File "Upload"]=file
"a.html", "fileb", "fileC" -> file
Normally, when you use this command to enter content, it will clear
the existing content of the text box. If you do not want to clear it,
but continue typing from the cursor, you can use ->> sign instead of ->
to make arrow. For example,
elems:
    [Textbox "Description"]=desc
"This is first line\n" -> desc
"This is second line\n" ->> desc
"This is third line\n" ->> desc
If you don’t want to type one character at a time, but type whole thing
at once, you can use =>. This command is useful when recording videos,
for example, sometimes you may want to enter a lot of text but you don’t want
the video to be too long.
elems:
    [Textbox "SSL cert"]=desc
"A huge text" => desc
Inserting code in CodeMirror
We can also use this command to insert code in CodeMirror, for example
goto https://codemirror.net/mode/css/index.html
e:
    [Text "padding: 3em 6em;"]=ln7

# first need to put the cursor on line 7
click -> ln7
# use the shortcut keys for codemirror to go line end
press('Alt+ArrowRight')
# add blank line after line 7
press('Enter')

e:
    [CodeMirror "CSS"]=cm

# append whatever code you need
'/*test inserting code*/' ->> cm
press('Enter') -> cm
'background-color: pink;' ->> cm
sleep 0.5s

e:
    [Text "/*test inserting code*/"]
    [Text "background-color: pink;"]
press(KEY) -> ID or press(KEY)
Emits a keyboard event with some special keys. You can check all supported key
names here. Element’s ID is optional.
If no element is specified, keyboard event will be fired on the window.
For example,
elems:
    [Textbox "Search..."]=search

"foobar" -> search
press('Enter') -> search
You can also press multiple keys to fire some keyboard shortcuts like copy and paste, by combining the keys by plus sign. For example,
elems:
    [Textbox "Search..."]=search

# ctrl+v paste something here
press('Control+v') -> search
ID [!]is STATE
Checks the state of the element with the id ID.
For Checkbox, Radio and Toggle, they can be checked whether
they are checked, or disabled, or readonly.
For Textbox and Dropdown, they can be checked whether
they are disabled, or readonly, or required.
For Button and Option, they can be checked whether they are disabled,
or enabled.
All the other elements cannot be checked for any of these states.
For example,
elems:
    [Checkbox "check this"]=checkbox
    [Textbox "text here"]=textbox
    [Dropdown "element type"]=dropdown
    [Button "disabled button"]=button
click -> checkbox
checkbox is checked
click -> checkbox
checkbox is unchecked
textbox is readonly
dropdown is required
button is disabled
You can add ! before is to check the opposite state. For example,
checkbox !is checked will check whether the checkbox is unchecked.
ID [!]eq|contains "something"|/something/
Checks the value of the element with the id ID.
For Textbox and Dropdown, it can be checked whether the value is equal to
some string or matches a regex (flag not supported), or contains some string.
For example,
elems:
    [Textbox "Text"]=textbox
"write something here" -> textbox
textbox eq 'write something here'
textbox eq /write.*here/
textbox contains "write"
textbox contains /some/
You can add ! before eq or contains to check the opposite state.
For example, textbox !is 'hello' will check whether the textbox was not equal
‘hello’.
capture begin|end|shot|shot zoomin|video start
Takes a screenshot or make a record for generating a GIF file or a video.
Taking screenshots
For example,
elems:
    [Textbox "Text1"]=box1
    [Textbox "Text2"]=box2

capture shot
capture shot zoomin
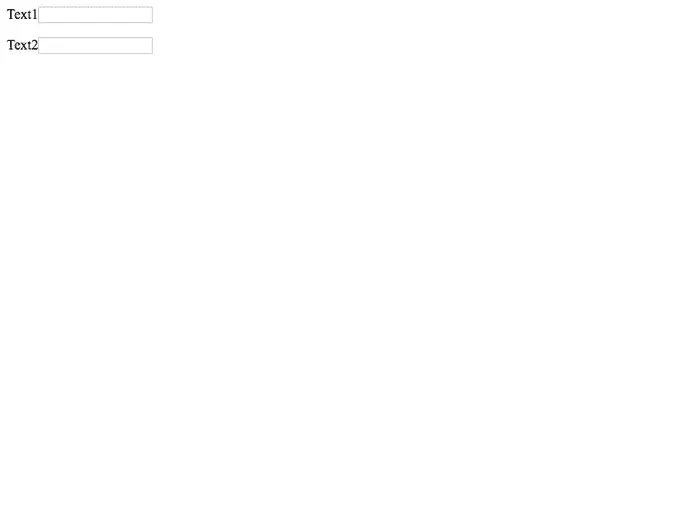
The frist capture shot command just takes a screenshot of the whole window:
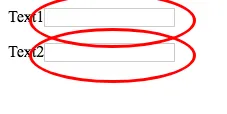
The second capture shot zoomin command would take a screenshot which zooms in
to cover the previous elems sections and highlights elements with ID:
Generating GIF animations
This feature is only available on MacOS. You need to install recording tools by
npm install aperture and install ffmpeg.
For example,
capture begin

elems:
    [Textbox "Text1"]=box1
    [Textbox "Text2"]=box2

"hello world" -> box1
"live long and prosper" -> box2

capture end
Note that the browser should be headless: false as the recording tool
records the video on the real desktop and then converts the video to GIF file.
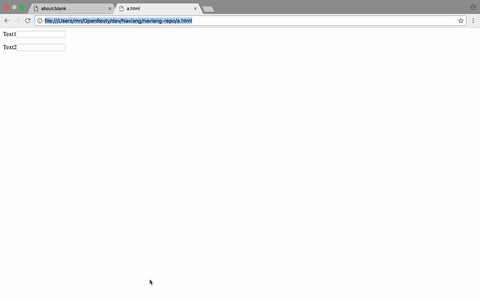
So you need to run it with NAVLANG_SHOW_UI=1. The generated GIF file is like:
For both screenshots and GIF files, if --gen-doc is enabled, the images will
be inserted to the markdown content.
For generating a video, please see the section Generating the video.
FROM_ELEM_ID ==> TO_ELEM_ID
Drags the element with FROM_ELEM_ID and drops on the element with TO_ELEM_ID.
It is implemented by mouse events which can be used to simulate drag. But this
can only be used on the website where the drag-and-drop is also implemented
by mouse events. If the target site implements the drag-and-drop by
HTML standard drag and drop API,
this command cannot fire the
drop event,
it is due to the limitation of puppeteer.
new|switch|close tab TAB_ID
Defines several browser tabs operations:
new tab TAB_IDopens a new browser tab and named it with IDTAB_ID. The ID of the new browser tab cannot bedefaultsince it is reserved for the default tab.switch tab TAB_IDactivates the browser tab withTAB_ID.close tab TAB_IDcloses the browser tab withTAB_ID.
hover -> ID
Moves the mouse over the element of the id ID, for example:
elems:
    [Button "Login"]=login

hover -> login
If you want to hover the element for some specific time, you can use
sleep command after hover. For example,
elems:
    [Button "Login"]=login

hover -> login
sleep 3s
click -> login
Also, next user interactive operation will wait for network idle.
select -> ID
Select all contents on the element of the id ID, for example:
elems:
    [Text /hello \w+/]=greeting

select -> greeting
The command is often used for highlighting something to get audiences’ attention.
callout(TIMEOUT) -> ID[, ...[, IDn]]
Use callout visual effect on element by their id ID, for example:
elems:
    [Text /hello \w+/]=greeting

callout -> greeting
The command is often used for highlighting something to get audiences' attention. It will try to scroll the element into view before adding callout visual effect.
callout supports highlighting multiple elements at the same time, we just
need to put all their ids after the -> operator, like:
elems:
    [Text "hello"]=h
    [Text "world"]=w

callout -> h,w
In this scene, the rectangular area consisting of all the elements will be highlighted.
If you need to adjust the duration of the callout effect, you can use the
TIMEOUT parameter, it is a time with a unit “s” or “ms”. For example:
elems:
    [Text "hello"]=h
    [Text "world"]
callout(10s) -> h
In the above code, the text hello will be highlighted for 10 seconds.
clip begin CLIP-NAME and clip end
The commands are used with generating video. It records the timestamps of begin and end of some video clips and output a INFILR-clips.txt file which can be used later for splitting the video into several clips with specified clip name. For example,
goto "http://url-a.com"
elems:
    [Textbox "Name"]=name
    [Radio "Radio"]=radio
    [Checkbox "Checkbox"]=checkbox

clip begin clip-sample
"input something" -> name
click -> radio
click -> checkbox
clip end
mouse DIRECTION DISTANCE
This command will move mouse to DIRECTION for DISTANCE.
For DIRECTION, up/down/left/right is supported. DISTANCE should be a
number value in pixel, other units was not support yet. px unit is optional.
Here is an example:
mouse up 10px
mouse right 150
scroll DIRECTION DISTANCE
This command allow users to scroll window for some distance. It will call
window.scrollBy to do it’s job, so if window could not scroll, like all
contents are shown in current viewport, nothing will happen, while the syntax
is grammatically correct.
This command will be useful if you want to make a video, or if something elements were hidden and lazy-loaded.
For DIRECTION, up/down/left/right is supported. DISTANCE should be a
number value in pixel, other units was not support yet. px unit is optional.
Here is an example:
goto "http://url-a.com"

scroll down 100px

desc:
    Now you can see something not in the first screen.
unmock http
This will remove all the previous defined mocked HTTP requests.
begin|end no video
Mark start time(begin) and end time(end) of the video, then we can delete
this part from the whole video.
history back|forward
Navigate to the previous(back) or the next(forward) page in history.
External Variables
External variables are supported in navlang. The value of the external variables can be specified via command line arguments or the environment variables.
Use $*VARIABLE_NAME to reference an external variable in navalang file.
For example, the following is test.nav file:
goto "https://$*TEST_HOST"

# --------- login page ---------

elems:
    [Title "Login"]
    [Textbox "User  Name"]=user
    [Textbox "Password"]=pass
    [Checkbox "Remember Me"]=remem
    [Button "Login"]=login

"$*TEST_USER" -> user
"$*TEST_PASS" -> pass
click -> remem
click -> login
To compile the navlang above, we can use command line arguments like this:
./navlang --define TEST_HOST=example-test.com \
--define TEST_USER=test-user \
--define TEST_PASS=test-password test.nav
We can also specify them using environment variables like this:
export TEST_HOST=example-test.com
export TEST_USER=test-user
export TEST_PASS=test-password
./navlang test.nav
Interpolation
Take a simple example:
elems:
    [Text /Job (\d+) 输出/]=job
click -> job

# exists
elems:
    [Text "$1"]

# or, for not exists
elems:
    ![Text "$1"]
In Navlang, you can use $N to reference the previous regexp captures.
Different from other languages, you could not use $0 to refer to
the whole matched string, but you could use $1~$N to refer submatch
group 1 through group N.
The references will be replaced by the strings they represent,
so in the second section of above example, you can use "Job $1"
to match the elements whose textContent equal to “Job 14077057”.
To use the capture in an input string is also supported,
that means "Hello, $1 and $2" -> some_input will work too.
You can set group name in regexp and use $(name) to reference the named
submatch capture. For example:
elems:
    [Text /Job (?<job_id>\d+) 输出/]=job
click -> job

# will find the elements has previous matched `job_id` as `textContent`
elems:
    [Text "$job_id"]
If there will be more than one regexp elements matching, like the need
in the opening, then you can use ${elem::N} to refer the submatch of matched
string. For example, to meet the need, we could write Navlang like this:
elems:
    [Text /Job (\d+) 输出/]=job

    [Link /相同工具上一个任务 (\d+)/]=link
click -> link

elems:
    ![Text "${job::1}"]
If you want to use the number in link, you could use ${link::1}
to reference it.
If there are more than one regexp elements matching, but you only use $N
in the next section, Navlang will automatically choose last matched element.
For example:
elems:
    [Text /\w+/]
    [Text /\d+/]
    [Text /Hello, (\w+)@openresty.com/]=welcome

elems:
    [Link "$1"]=link
click -> link
Then the string in the third element, generally the string of user account will be used.
And, you can use the pre-captured text as content to input into another element, like this:
elems:
    [Text /hello, ([\w-+.]+)@openresty.com/]=welcome

elems:
    [Textbox "Username"]=username
"$1" -> username
Also, you can use backslash to escape $, to avoid it been replaced, to use
the literal $1 to $N.
elems:
    [Text "\$1"]=link
click -> link

# p hello
# p
#   input
elems:
    [Textbox "hello"]=input
"\$1" -> input
input eq "\$1"
For desc:
Using string interpolation in d: need some changes. Since $ may appear
frequently in description text, we need a more rare expression. So please
add ! marks on both sides of the quote, like:
d:
    say !${greeting}!
    say !${greeting::1}!
Supported Key names for press
    '0',
    '1',
    '2',
    '3',
    '4',
    '5',
    '6',
    '7',
    '8',
    '9',
    'Power',
    'Eject',
    'Abort',
    'Help',
    'Backspace',
    'Tab',
    'Numpad5',
    'NumpadEnter',
    'Enter',
    '\r',
    '\n',
    'ShiftLeft',
    'ShiftRight',
    'ControlLeft',
    'ControlRight',
    'AltLeft',
    'AltRight',
    'Pause',
    'CapsLock',
    'Escape',
    'Convert',
    'NonConvert',
    'Space',
    'Numpad9',
    'PageUp',
    'Numpad3',
    'PageDown',
    'End',
    'Numpad1',
    'Home',
    'Numpad7',
    'ArrowLeft',
    'Numpad4',
    'Numpad8',
    'ArrowUp',
    'ArrowRight',
    'Numpad6',
    'Numpad2',
    'ArrowDown',
    'Select',
    'Open',
    'PrintScreen',
    'Insert',
    'Numpad0',
    'Delete',
    'NumpadDecimal',
    'Digit0',
    'Digit1',
    'Digit2',
    'Digit3',
    'Digit4',
    'Digit5',
    'Digit6',
    'Digit7',
    'Digit8',
    'Digit9',
    'KeyA',
    'KeyB',
    'KeyC',
    'KeyD',
    'KeyE',
    'KeyF',
    'KeyG',
    'KeyH',
    'KeyI',
    'KeyJ',
    'KeyK',
    'KeyL',
    'KeyM',
    'KeyN',
    'KeyO',
    'KeyP',
    'KeyQ',
    'KeyR',
    'KeyS',
    'KeyT',
    'KeyU',
    'KeyV',
    'KeyW',
    'KeyX',
    'KeyY',
    'KeyZ',
    'MetaLeft',
    'MetaRight',
    'ContextMenu',
    'NumpadMultiply',
    'NumpadAdd',
    'NumpadSubtract',
    'NumpadDivide',
    'F1',
    'F2',
    'F3',
    'F4',
    'F5',
    'F6',
    'F7',
    'F8',
    'F9',
    'F10',
    'F11',
    'F12',
    'F13',
    'F14',
    'F15',
    'F16',
    'F17',
    'F18',
    'F19',
    'F20',
    'F21',
    'F22',
    'F23',
    'F24',
    'NumLock',
    'ScrollLock',
    'AudioVolumeMute',
    'AudioVolumeDown',
    'AudioVolumeUp',
    'MediaTrackNext',
    'MediaTrackPrevious',
    'MediaStop',
    'MediaPlayPause',
    'Semicolon',
    'Equal',
    'NumpadEqual',
    'Comma',
    'Minus',
    'Period',
    'Slash',
    'Backquote',
    'BracketLeft',
    'Backslash',
    'BracketRight',
    'Quote',
    'AltGraph',
    'Props',
    'Cancel',
    'Clear',
    'Shift',
    'Control',
    'Alt',
    'Accept',
    'ModeChange',
    ' ',
    'Print',
    'Execute',
    '\u0000',
    'a',
    'b',
    'c',
    'd',
    'e',
    'f',
    'g',
    'h',
    'i',
    'j',
    'k',
    'l',
    'm',
    'n',
    'o',
    'p',
    'q',
    'r',
    's',
    't',
    'u',
    'v',
    'w',
    'x',
    'y',
    'z',
    'Meta',
    '*',
    '+',
    '-',
    '/',
    ';',
    '=',
    ',',
    '.',
    '`',
    '[',
    '\\',
    ']',
    "'",
    'Attn',
    'CrSel',
    'ExSel',
    'EraseEof',
    'Play',
    'ZoomOut',
    ')',
    '!',
    '@',
    '#',
    '$',
    '%',
    '^',
    '&',
    '(',
    'A',
    'B',
    'C',
    'D',
    'E',
    'F',
    'G',
    'H',
    'I',
    'J',
    'K',
    'L',
    'M',
    'N',
    'O',
    'P',
    'Q',
    'R',
    'S',
    'T',
    'U',
    'V',
    'W',
    'X',
    'Y',
    'Z',
    ':',
    '<',
    '_',
    '>',
    '?',
    '~',
    '{',
    '|',
    '}',
    '"',
    'SoftLeft',
    'SoftRight',
    'Camera',
    'Call',
    'EndCall',
    'VolumeDown',
    'VolumeUp',
Author
Yichun Zhang (agentzh) yichun@openresty.com
Copyright & Licenses
Copyright (C) 2017-2021 OpenResty Inc. All rights reserved.
This software is proprietary and must not be redistributed or shared at all.