OpenID Connect
In the digital age, secure identity authentication has become indispensable to online services. OpenID Connect (OIDC) is an identity authentication layer built on top of the OAuth 2.0 protocol. It allows third-party applications to authenticate user identities and securely obtain user information through a simplified process. This article will provide a detailed introduction to using OpenID Connect to log in to the OpenResty Edge Admin console through a third-party authentication and authorization service platform.
Adding an OpenIDC Provider
Go to the Global Configuration > OpenIDC Providers page:
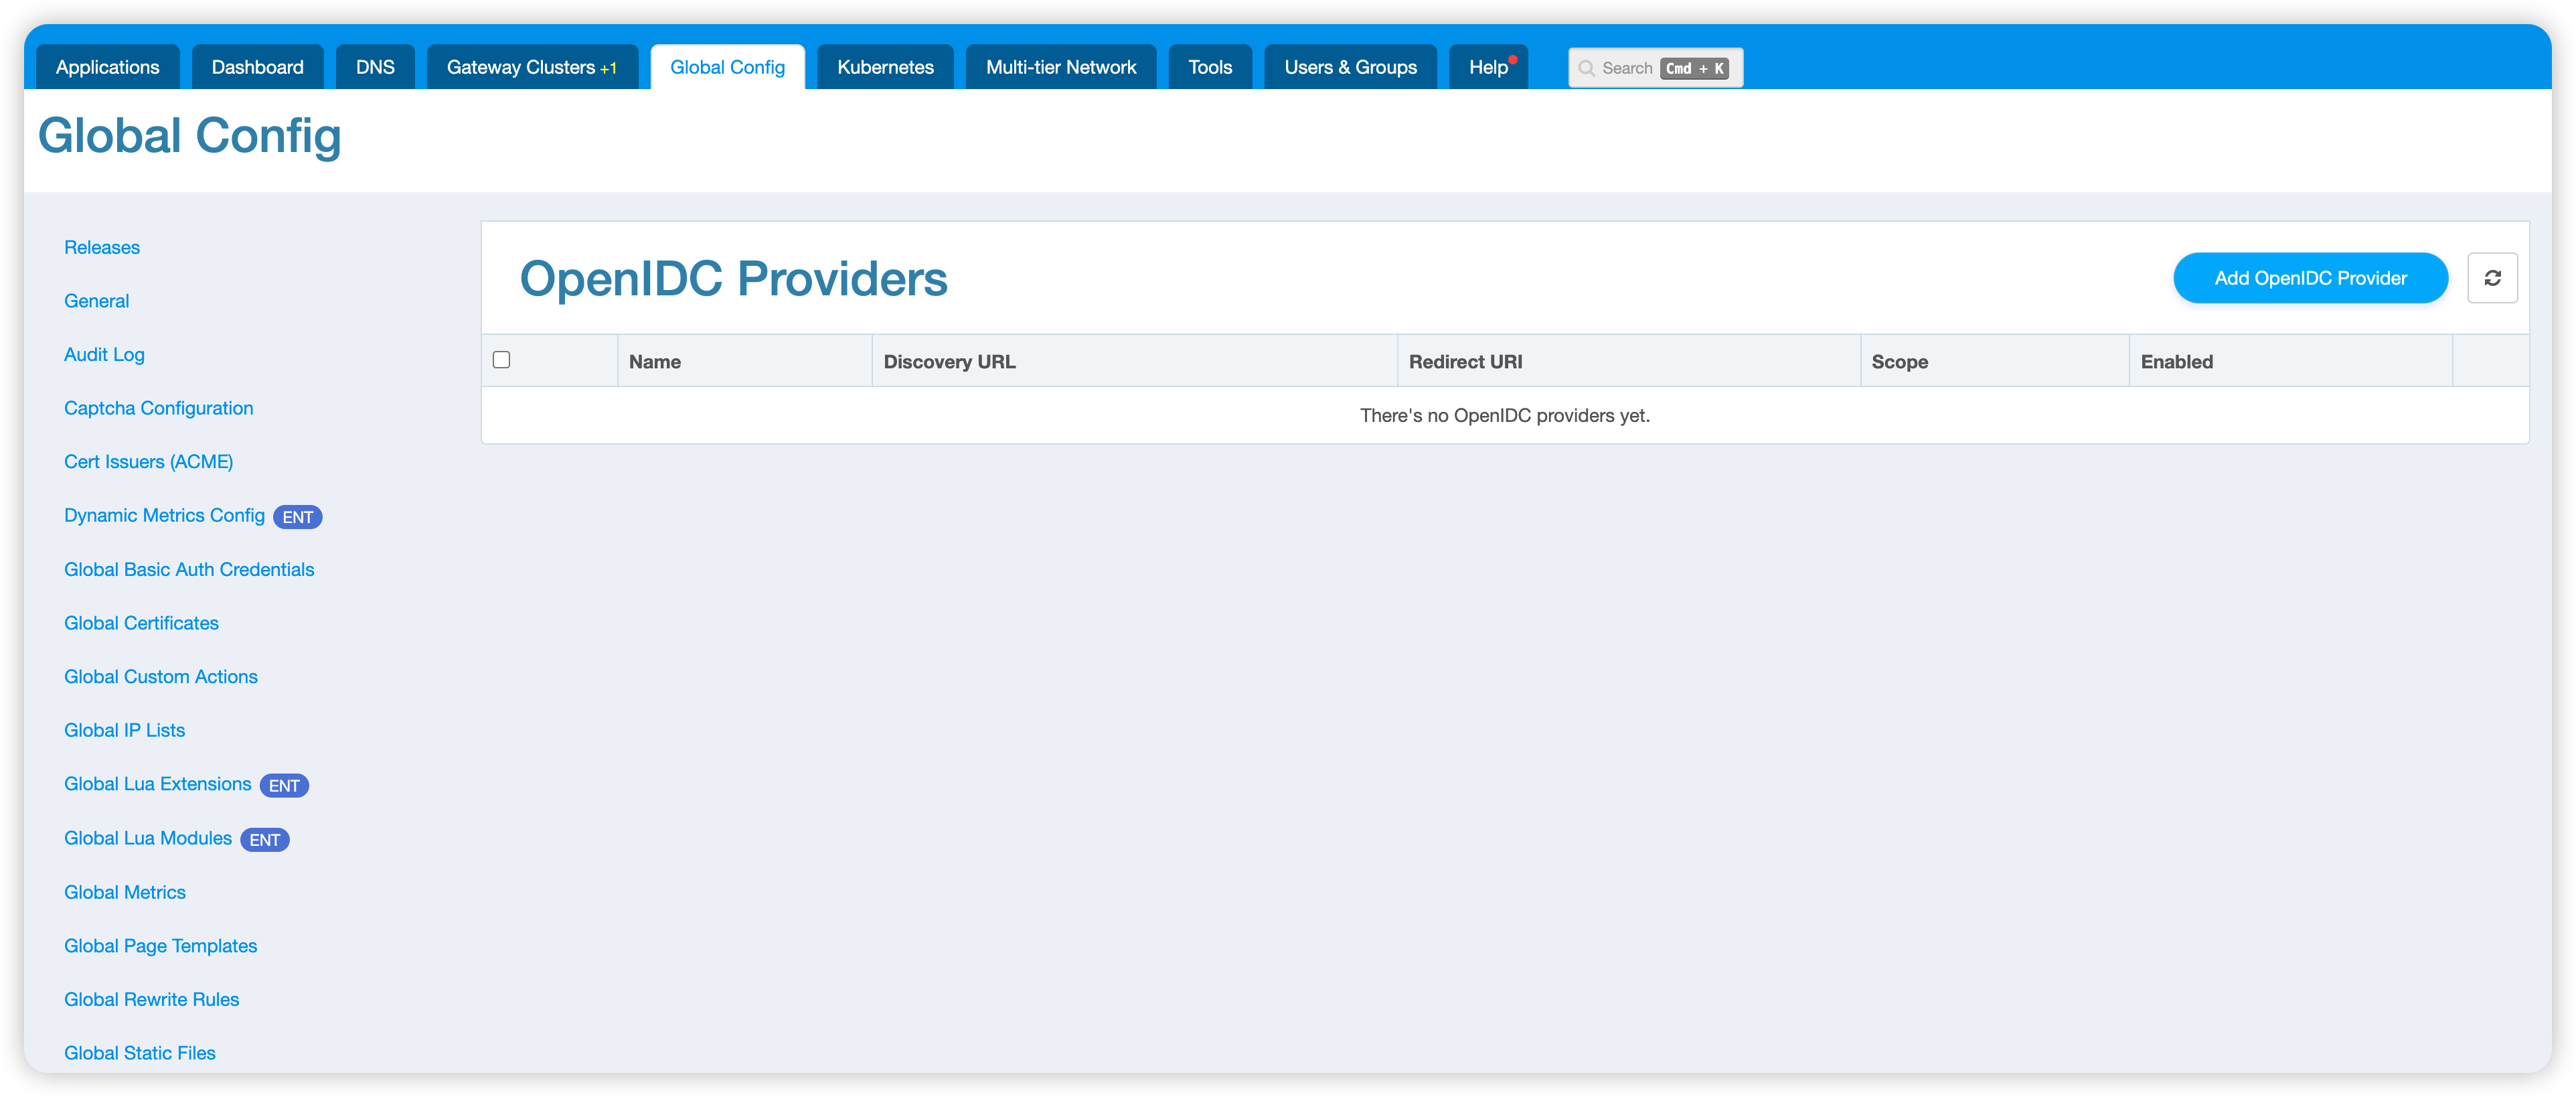
Click the Add OpenIDC Provider button to add a new OpenIDC provider.
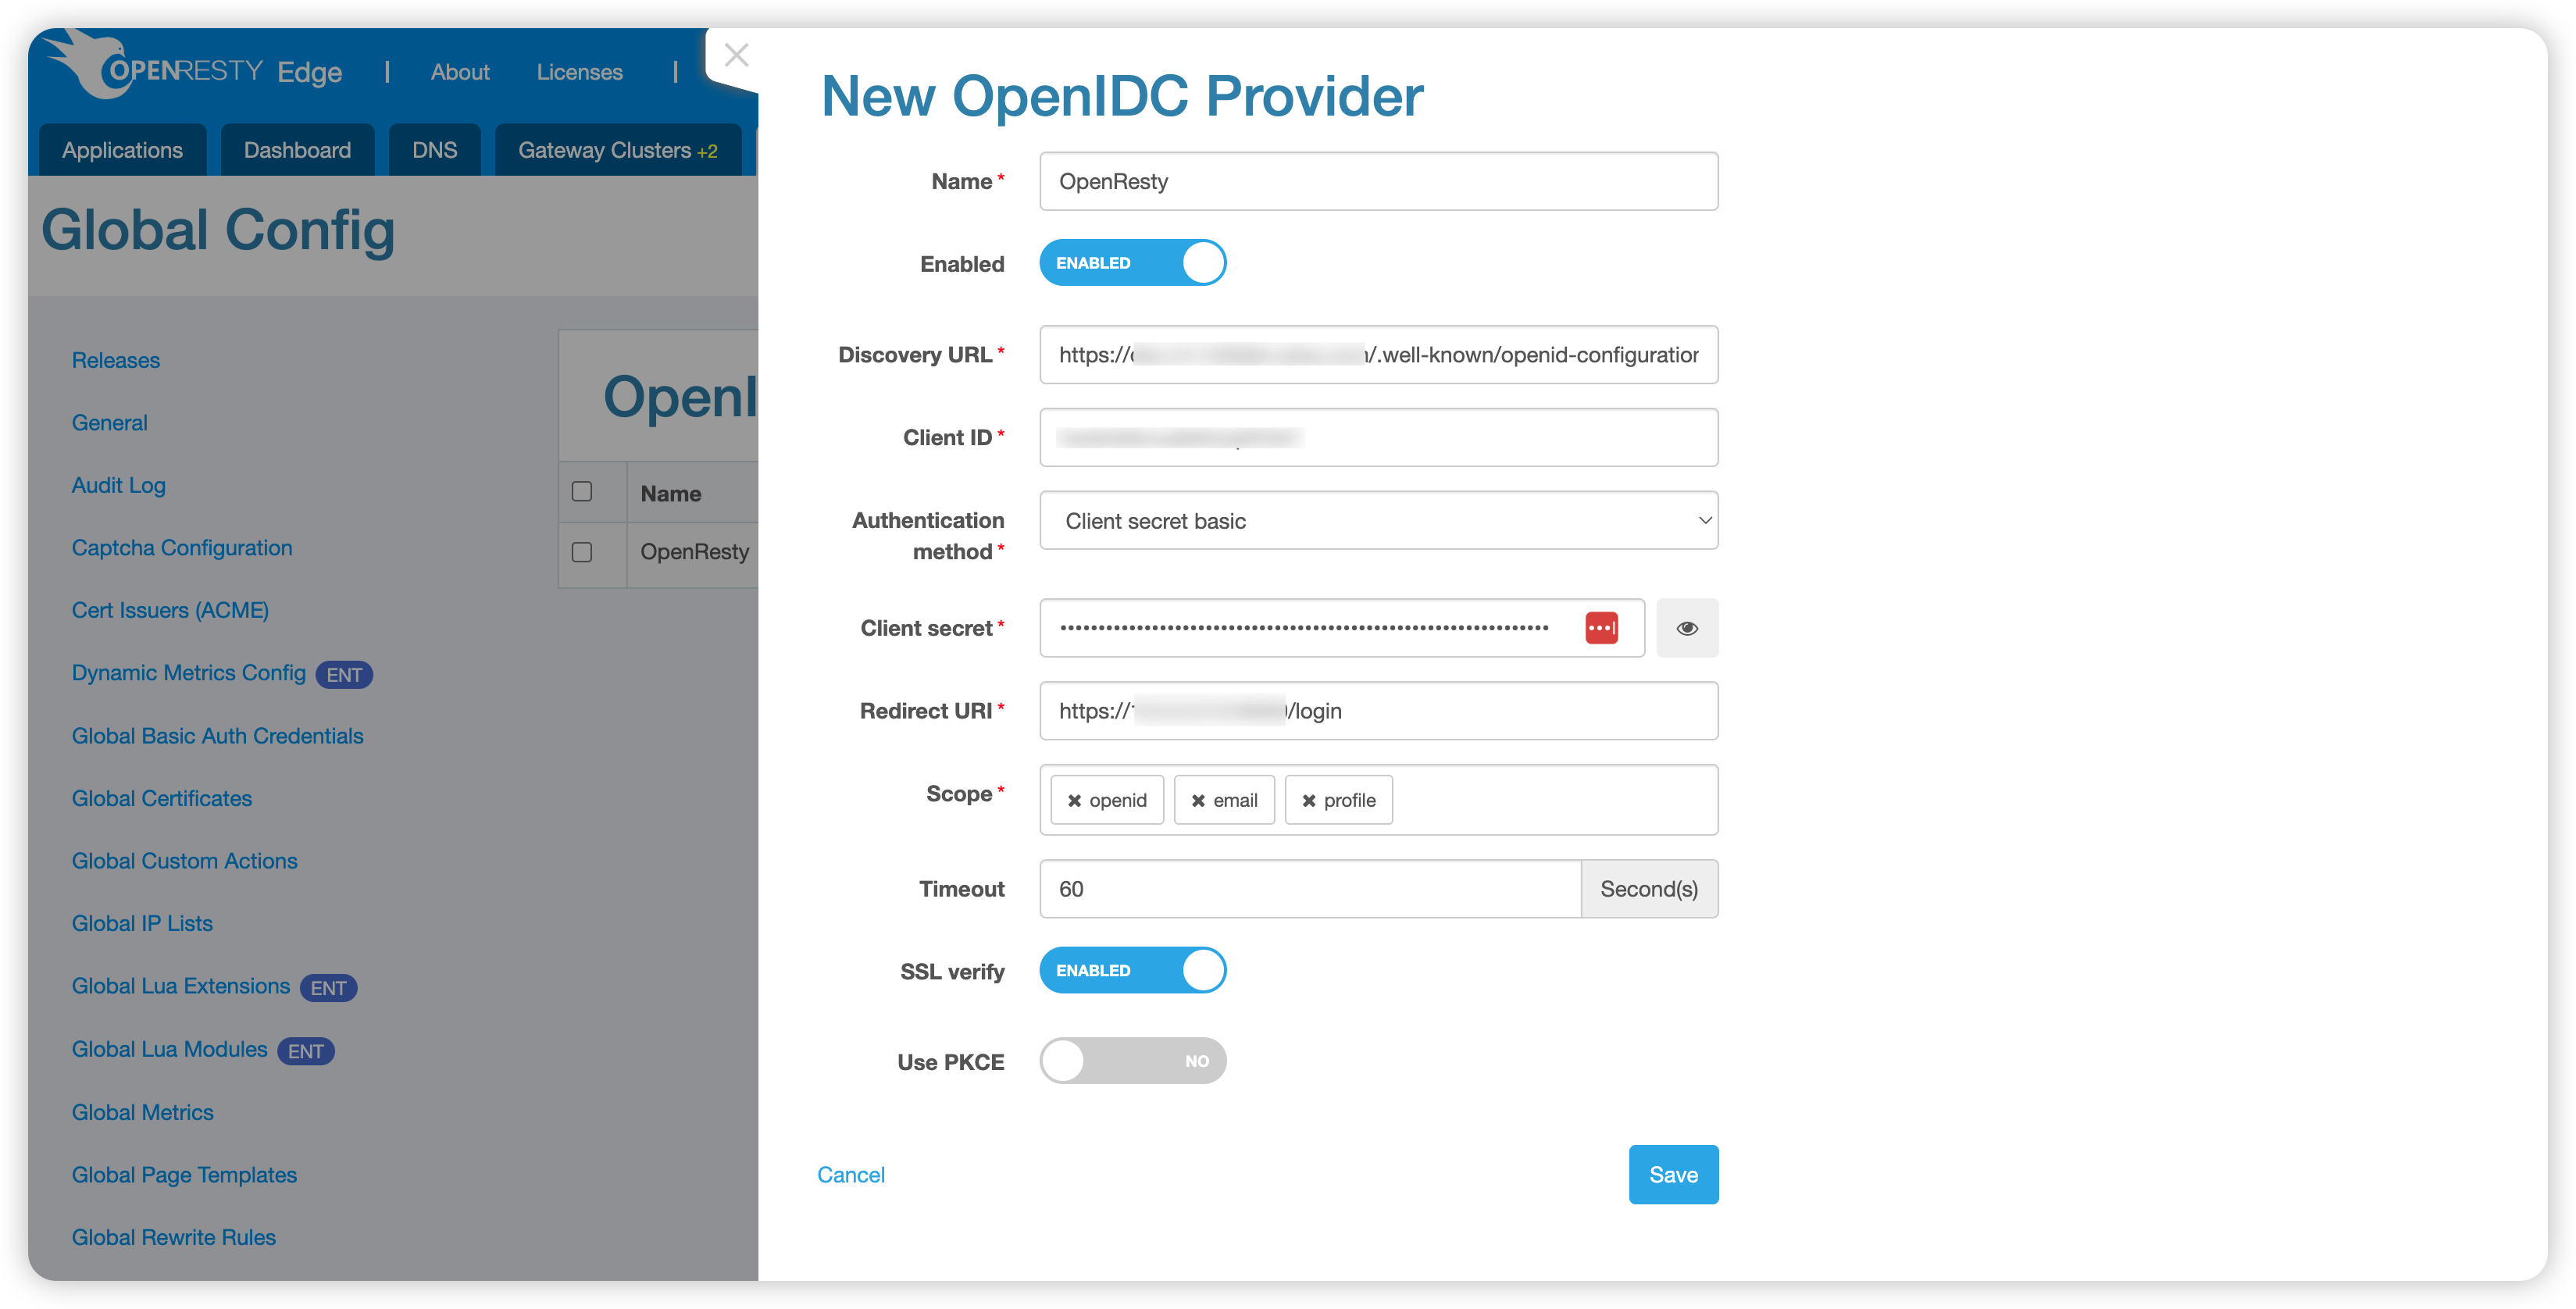
- Name: The name of the OpenIDC provider, which will generate a corresponding button on the login page. It’s recommended that it be short and easy to read.
- Enabled: Enable or disable the provider. Only a limited number of OpenIDC providers are allowed to be enabled in the OpenResty Edge.
- Discovery URL: The URL for discovering the OpenIDC provider’s configuration, usually in the format
https://EXAMPLE.com/.well-known/openid-configuration. - Client ID: Your account identifier with the OpenIDC provider.
- Authentication Method: Currently supports
Client secret basic,Client secret post, andPrivate key JWT. - Client Secret: The secret key used for authentication with the OpenIDC provider. Required when the authentication method is set to
Client secret basicorClient secret post. - Private Key: The private key used for authentication with the OpenIDC provider. Required when the authentication method is set to
Private key JWT. - Private Key ID: The ID of the private key. Only required when the authentication method is set to
Private key JWT. - Redirect URI: The URI will redirect after successful login with the OpenIDC provider, allowing OpenResty Edge to continue processing the subsequent login flow. The value is automatically populated by default but can be modified as needed.
- Scope: Specifies the information that needs to be returned by the OpenIDC provider.
emailis mandatory because OpenResty Edge currently usesemailto bind the OpenIDC provider account with the OpenResty Edge account. - Timeout: The timeout for requests between OpenResty Edge and the OpenIDC provider, defaulting to 60 seconds.
- SSL Verification: Determines whether to verify the certificate of the OpenIDC provider. It’s enabled by default and is recommended to be kept enabled.
- Use PKCE: PKCE (Proof Key for Code Exchange) is a technique used to improve the security of the authorization code grant flow. Enable this option to use PKCE.
Binding OpenResty Edge Account with OpenIDC Provider Account
After adding the OpenIDC provider, bind your OpenResty Edge account with the OpenIDC provider account:
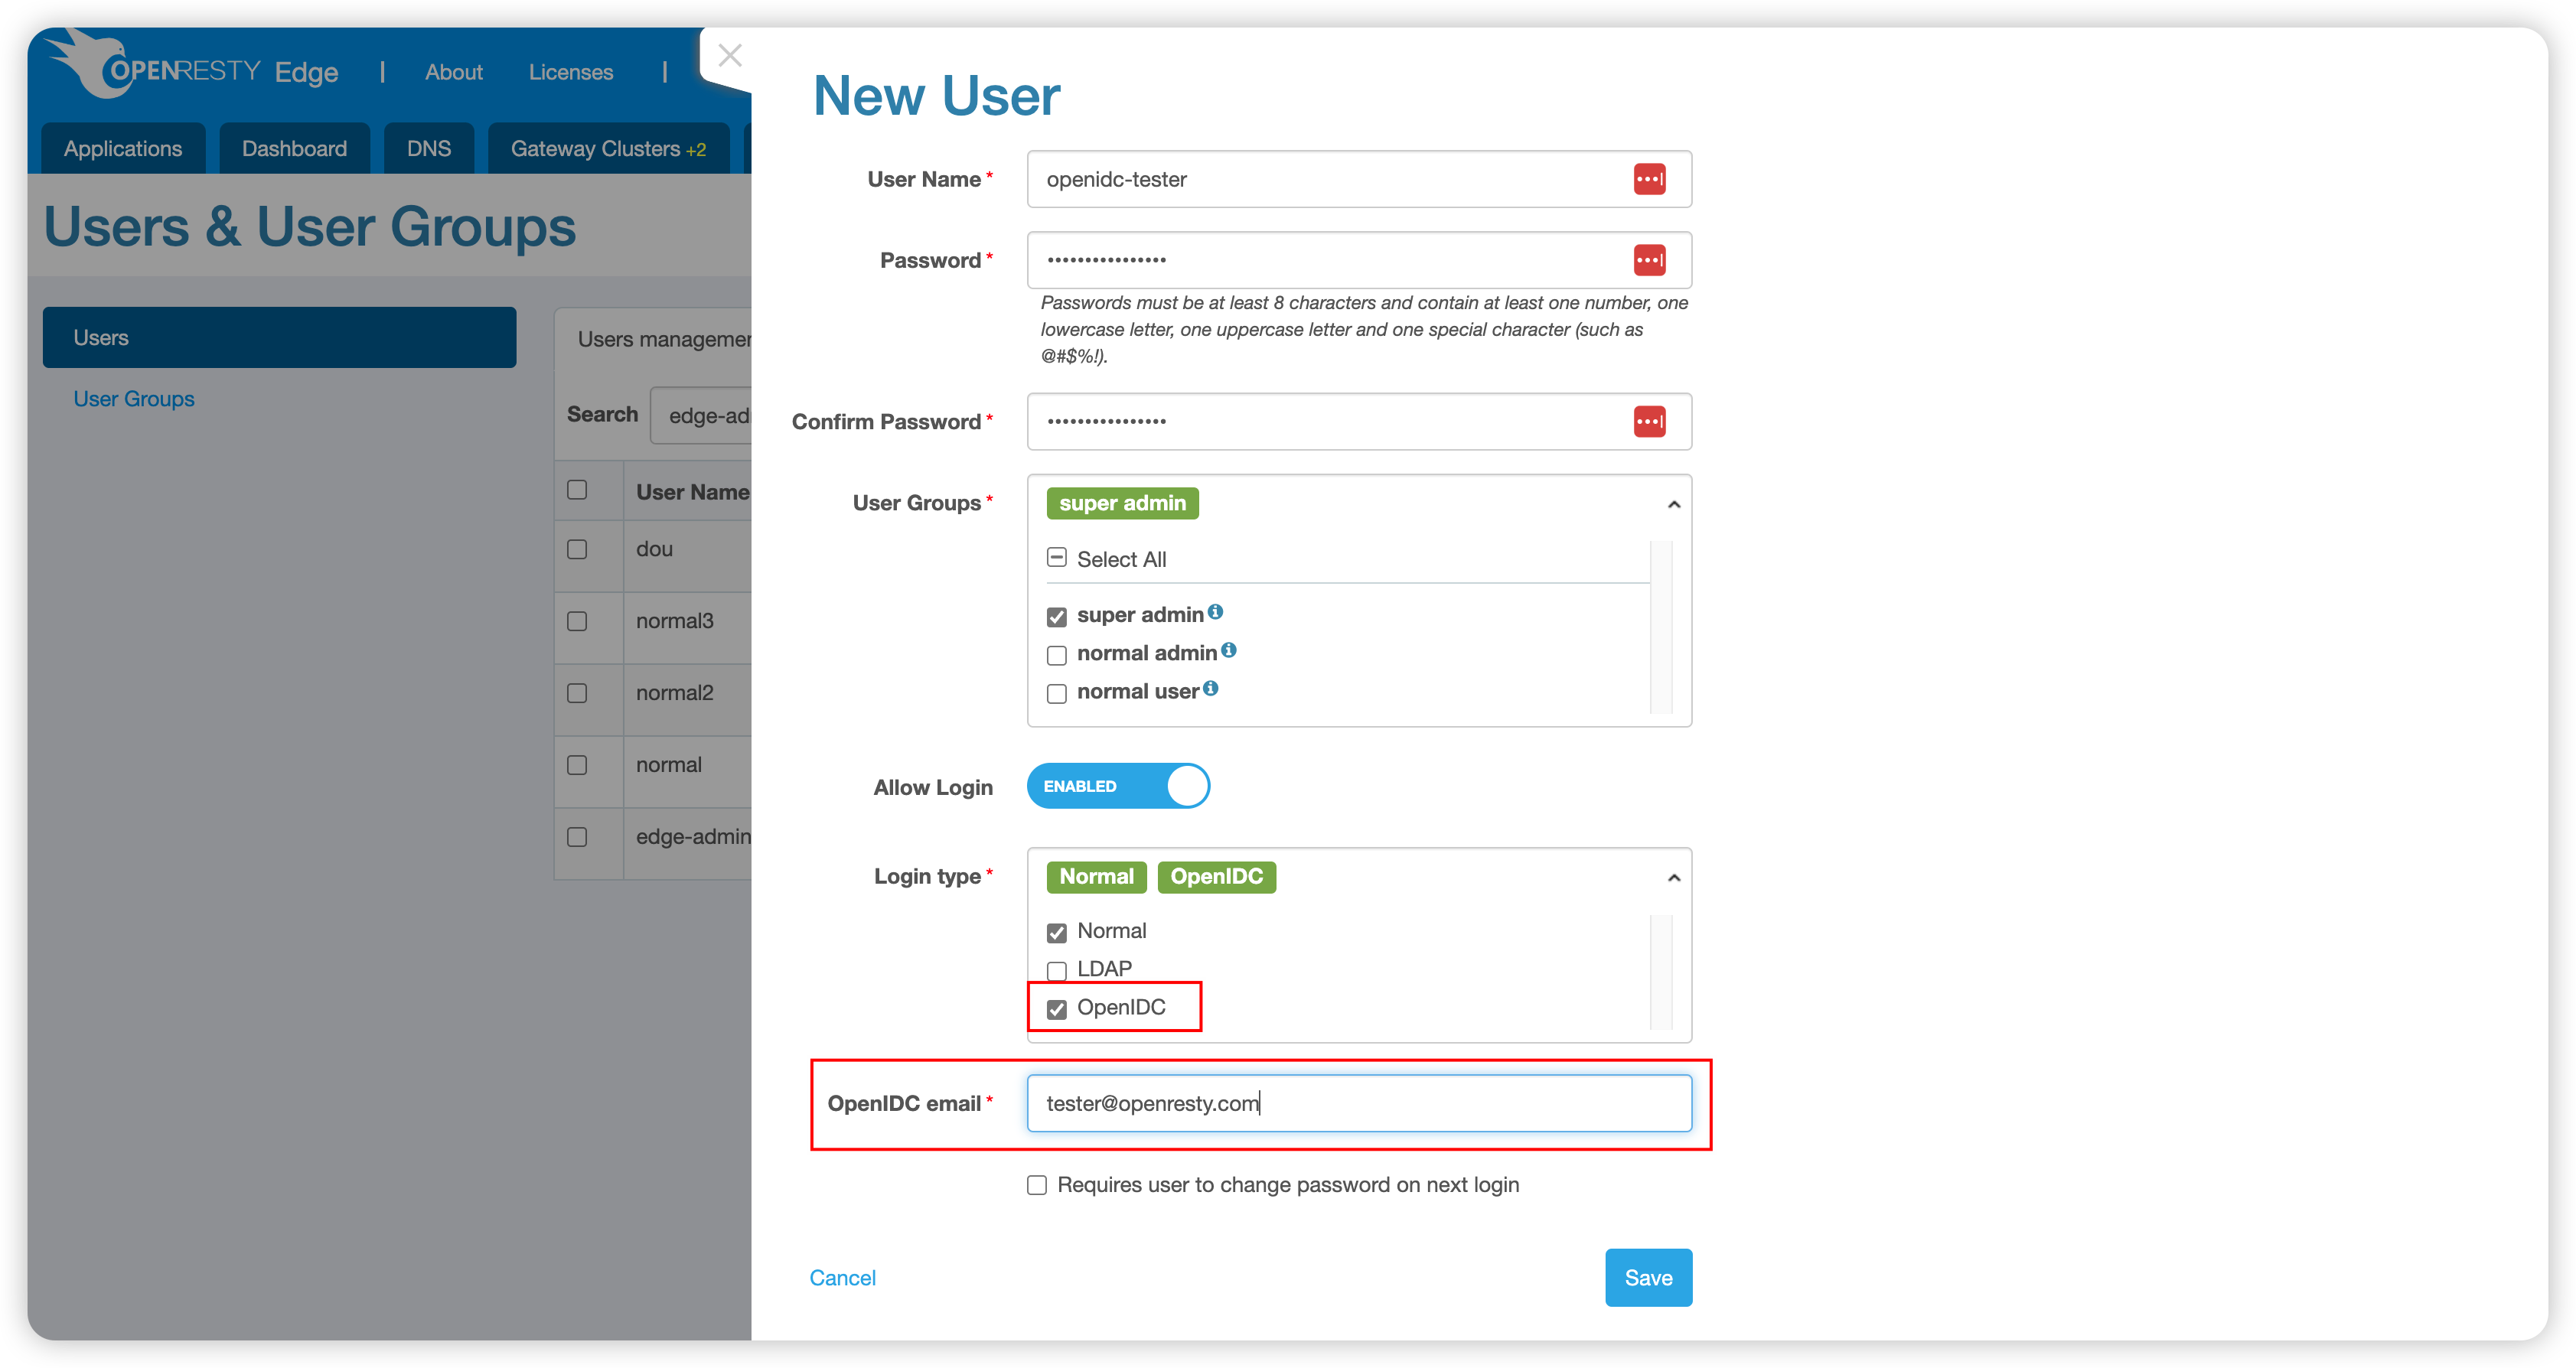
- Select the Login Type as
OpenIDC. - Enter the OpenIDC email to complete the binding.
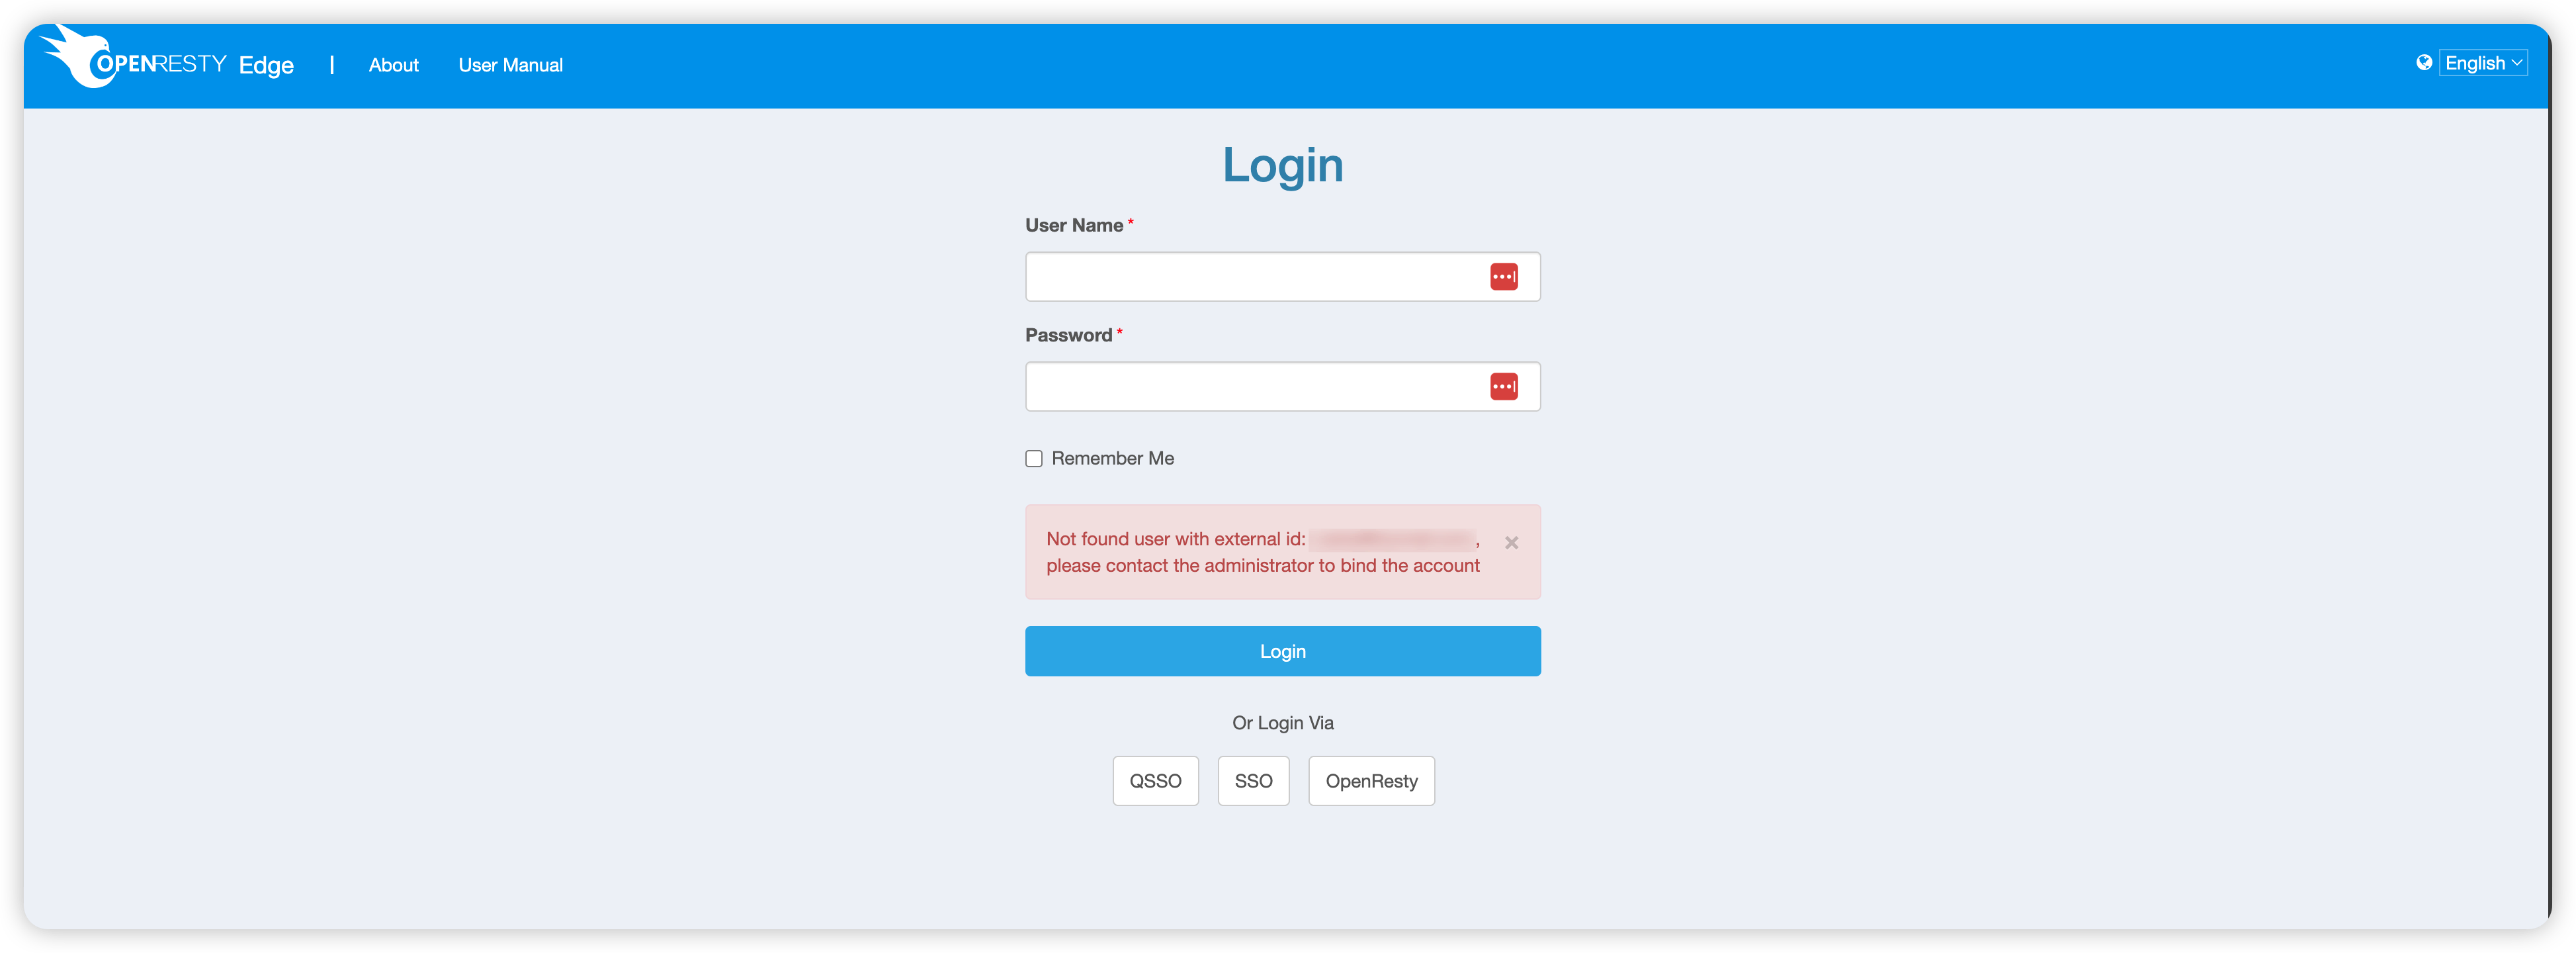
Logging in with OpenIDC
After binding, you can use OpenIDC to log in:
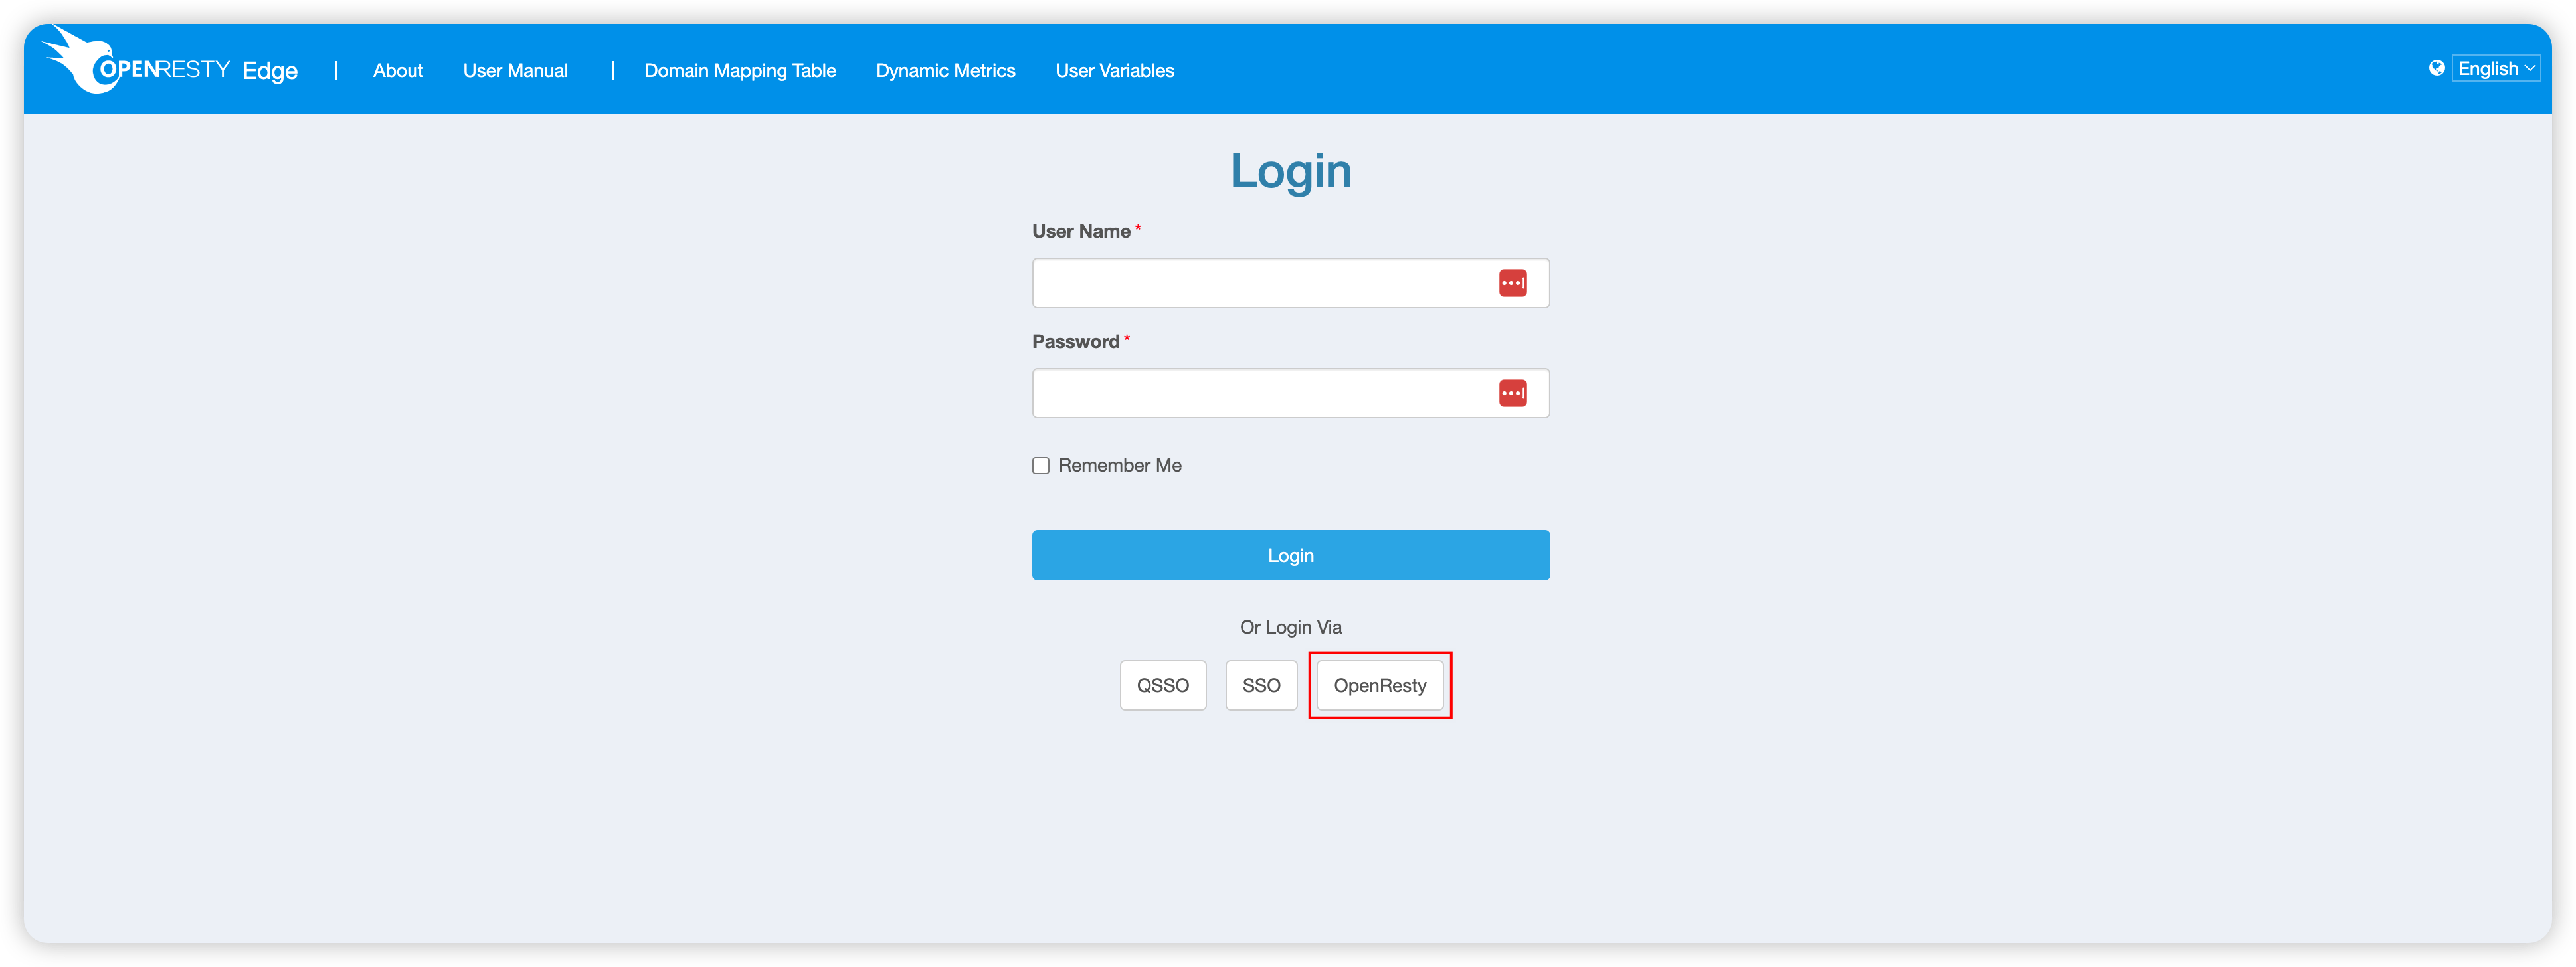
Click the automatically generated button (assuming it’s OpenResty), and you will be redirected to the corresponding login screen. After successfully logging in on the third-party login screen, you will be automatically redirected back to OpenResty Edge.
If you successfully log in to OpenResty Edge, you will automatically enter the management interface:
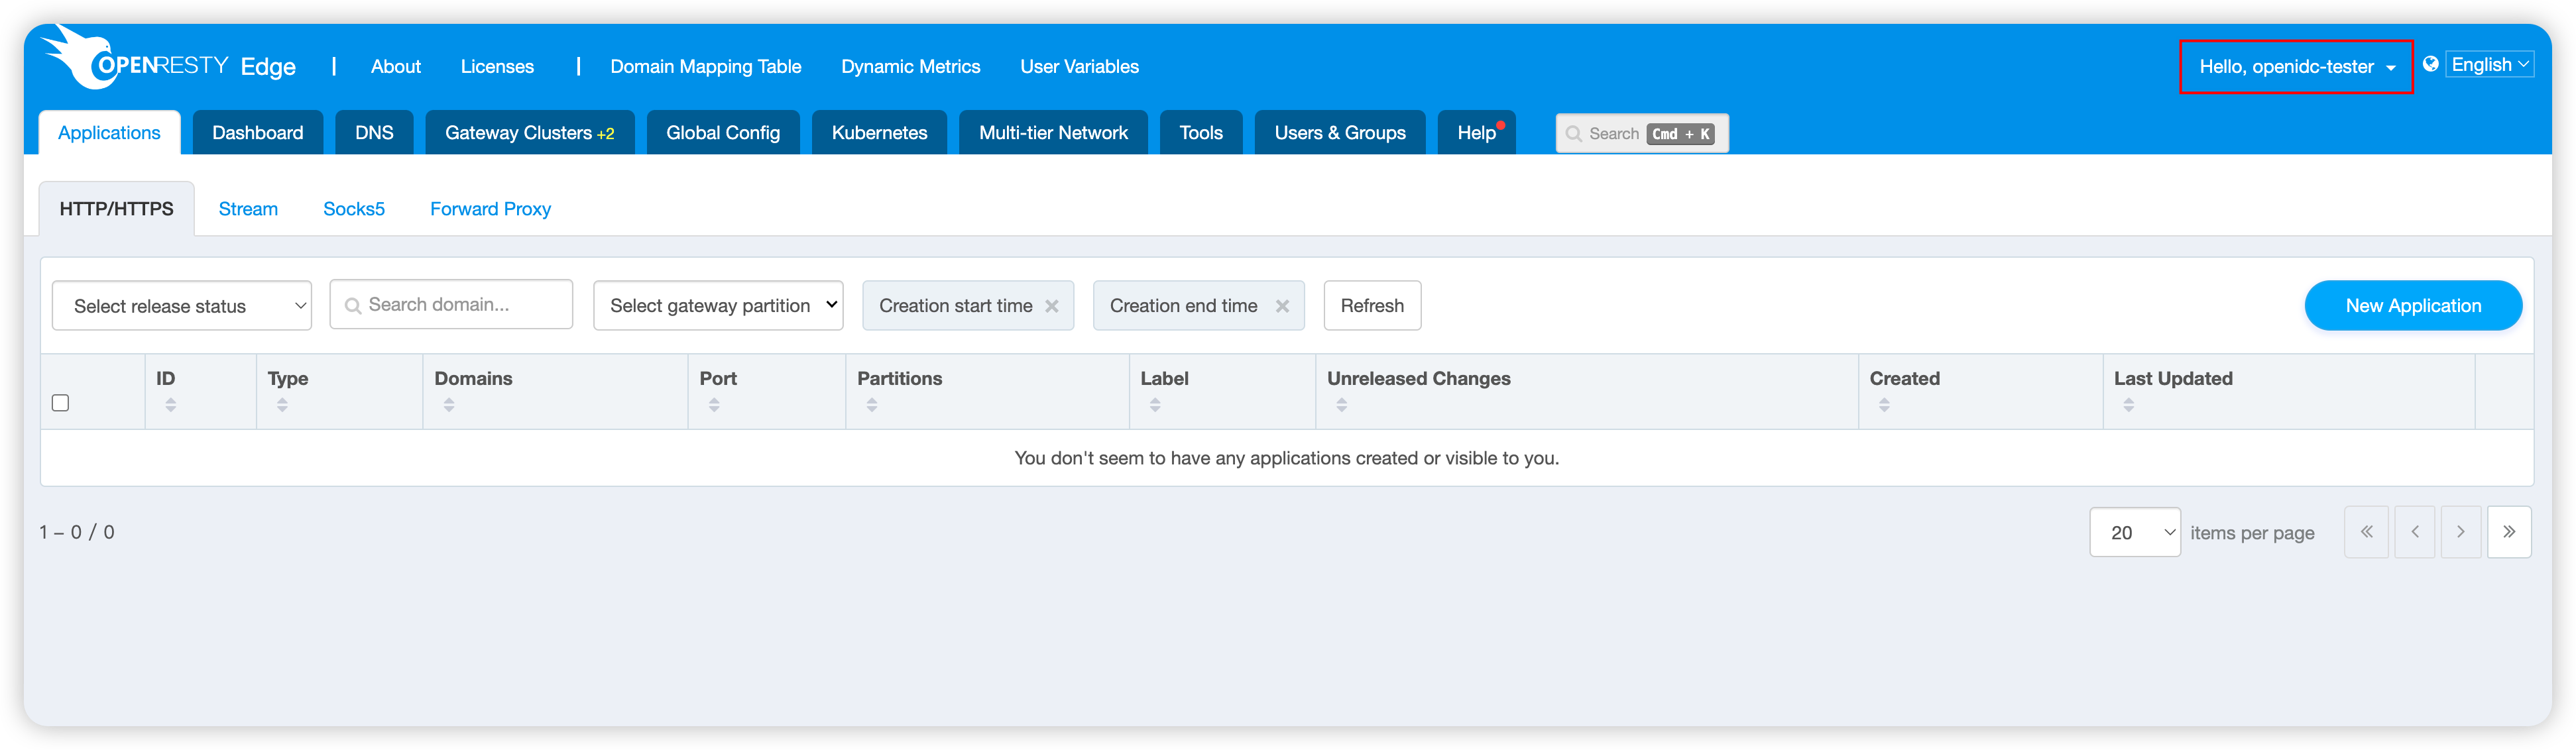
You can see that the username is now the openidc-tester we specified earlier.
If the login fails, an error message will be displayed: