Enable OpenIDC Authentication
OpenResty Edge supports the OpenID Connect (OpenIDC, OIDC) protocol, which enables user authentication by obtaining user information from Identity Providers (IdP).
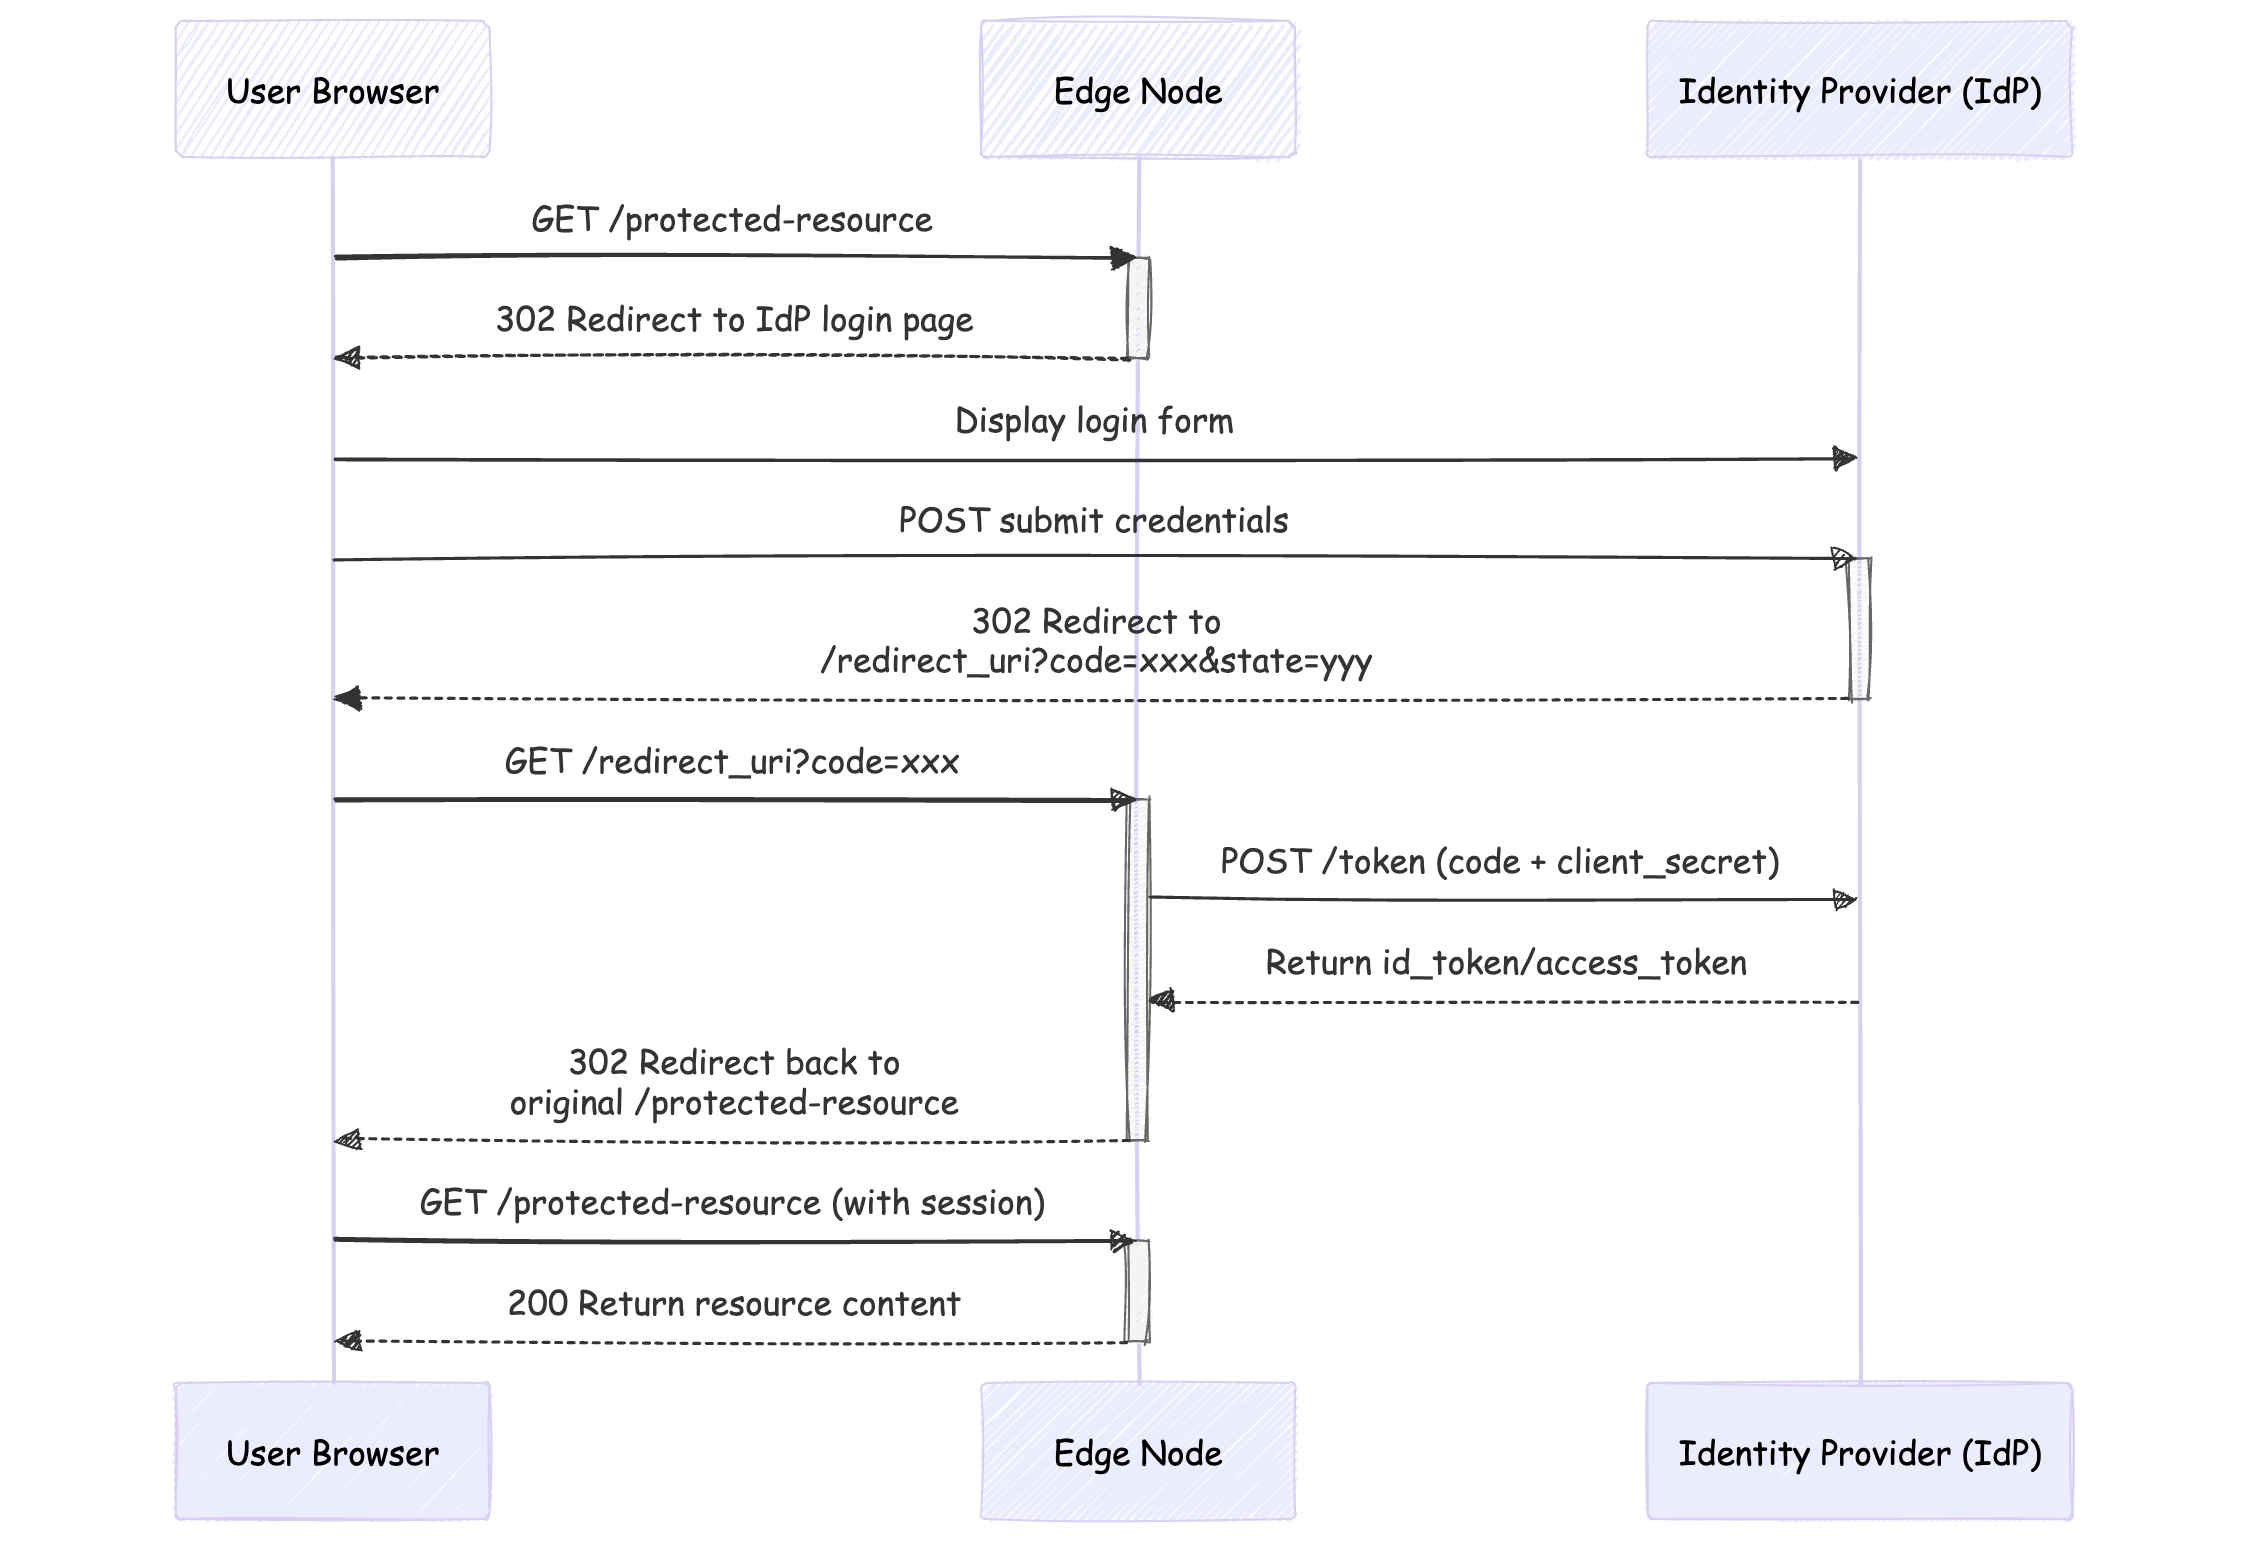
Workflow
The OpenIDC workflow is as follows:
Configuration Guide
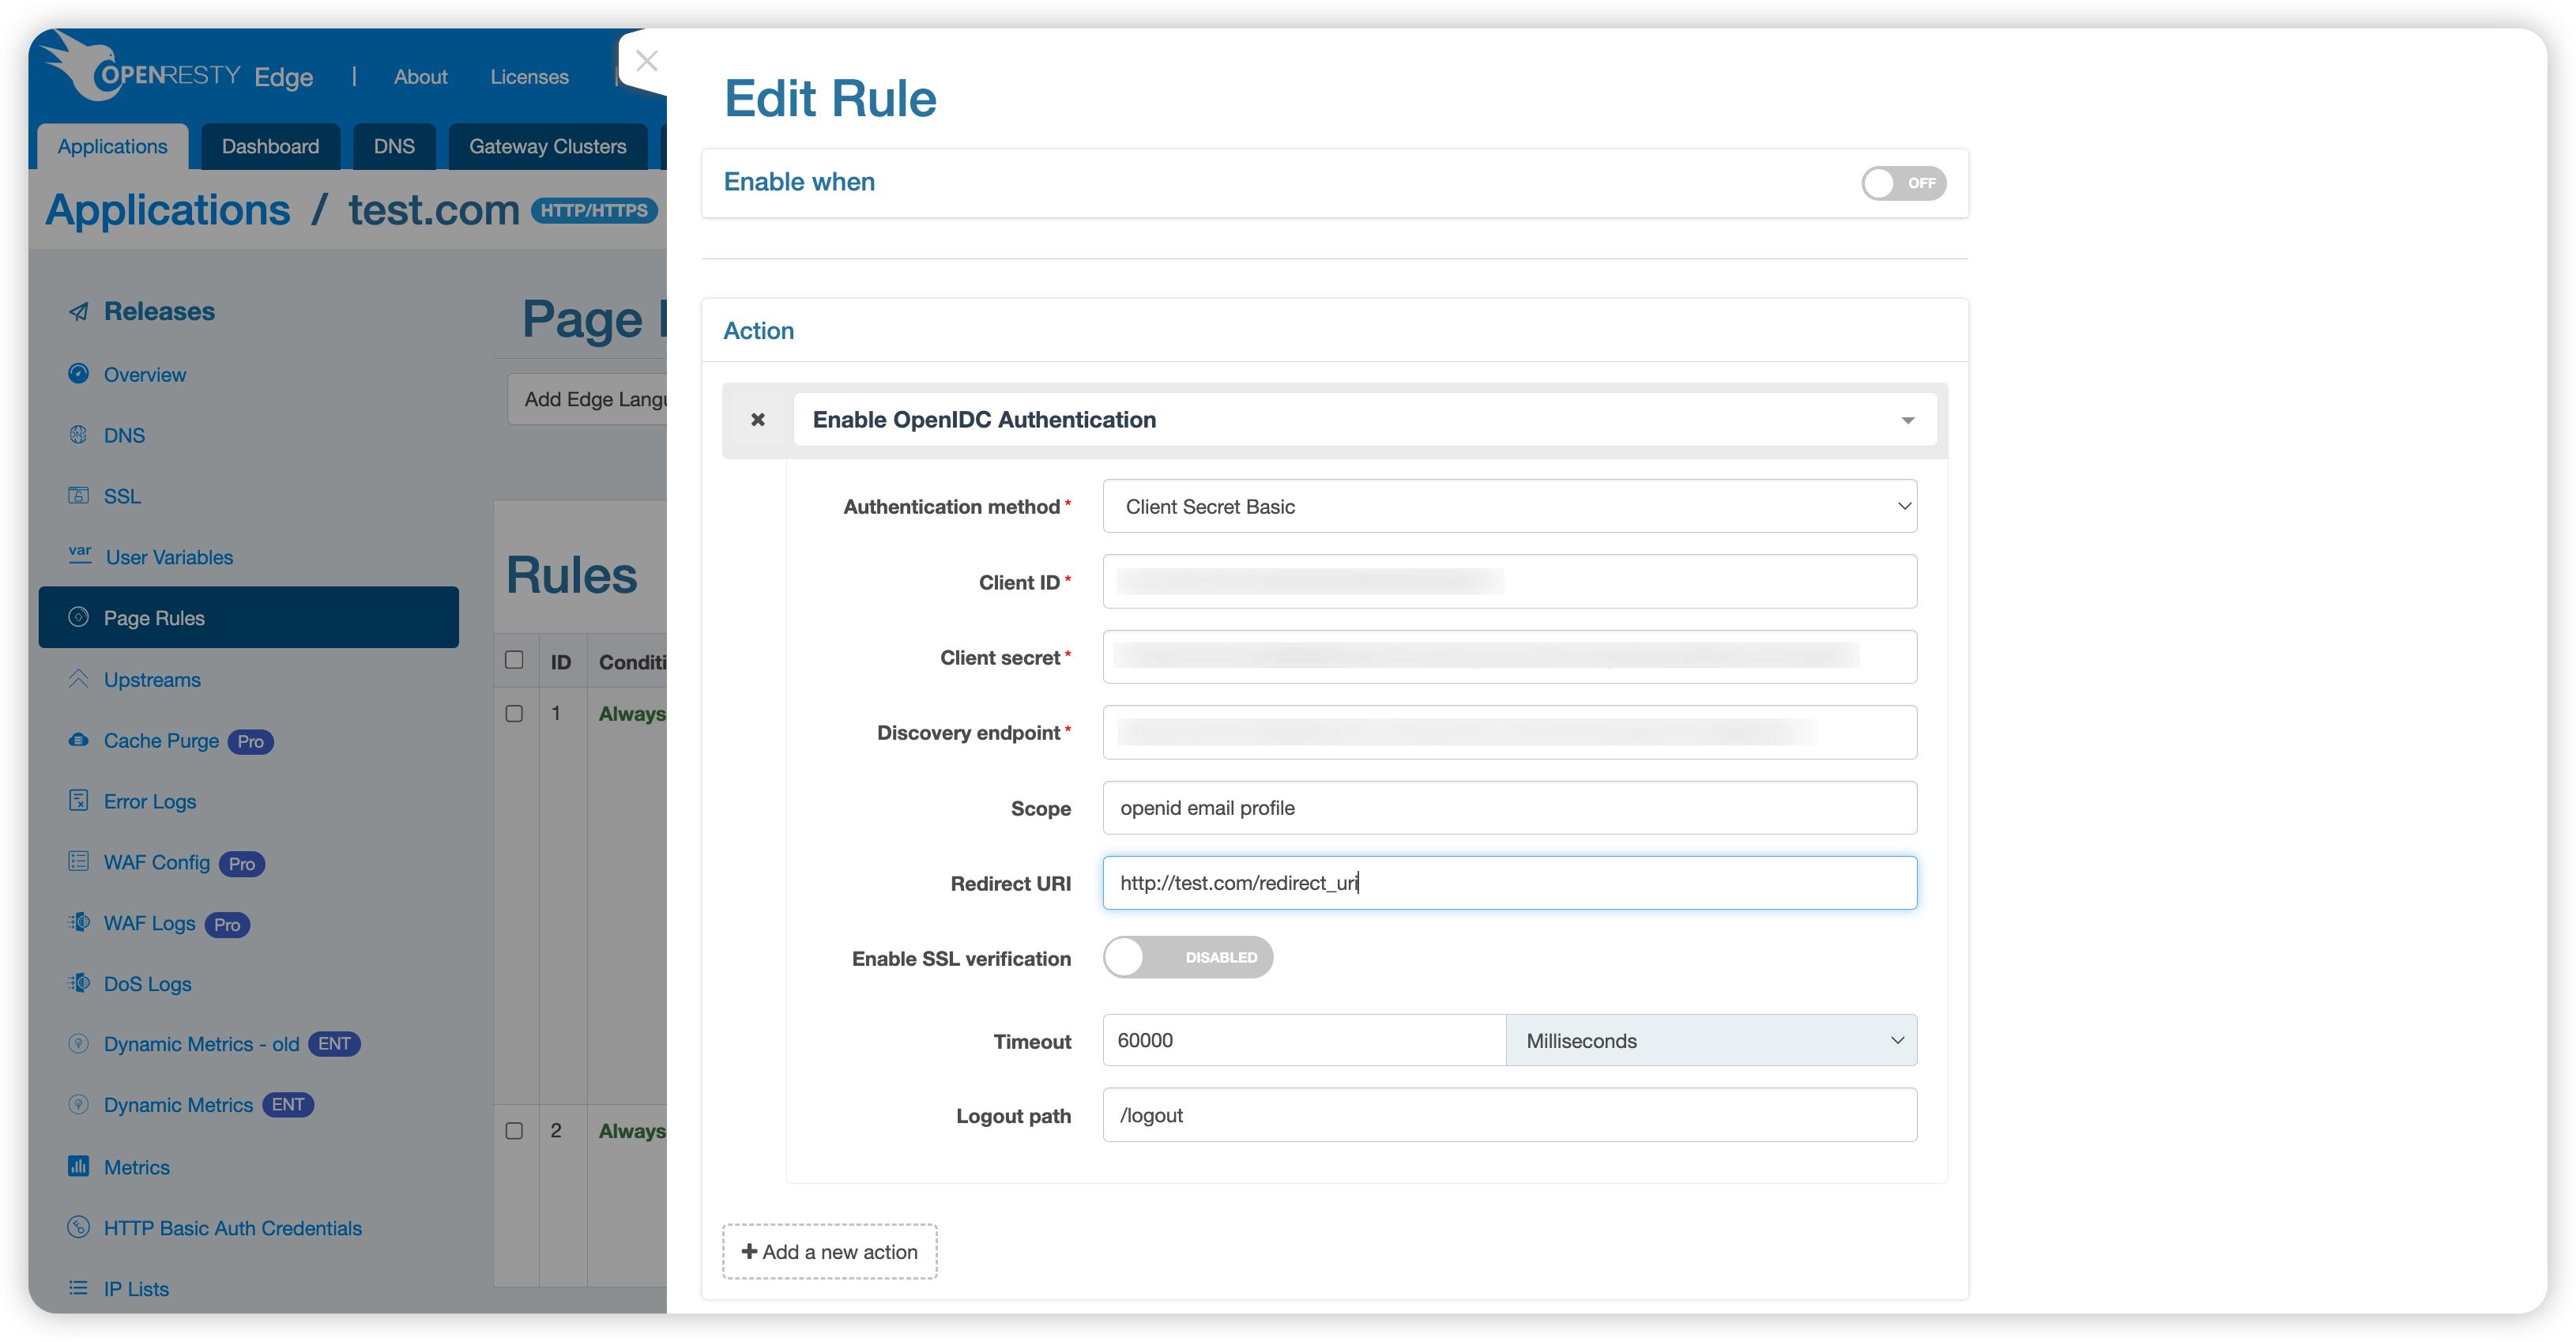
In HTTP Applications > Specific Application > Page Rules > Page Rule Actions, find Enable OpenIDC Authentication:
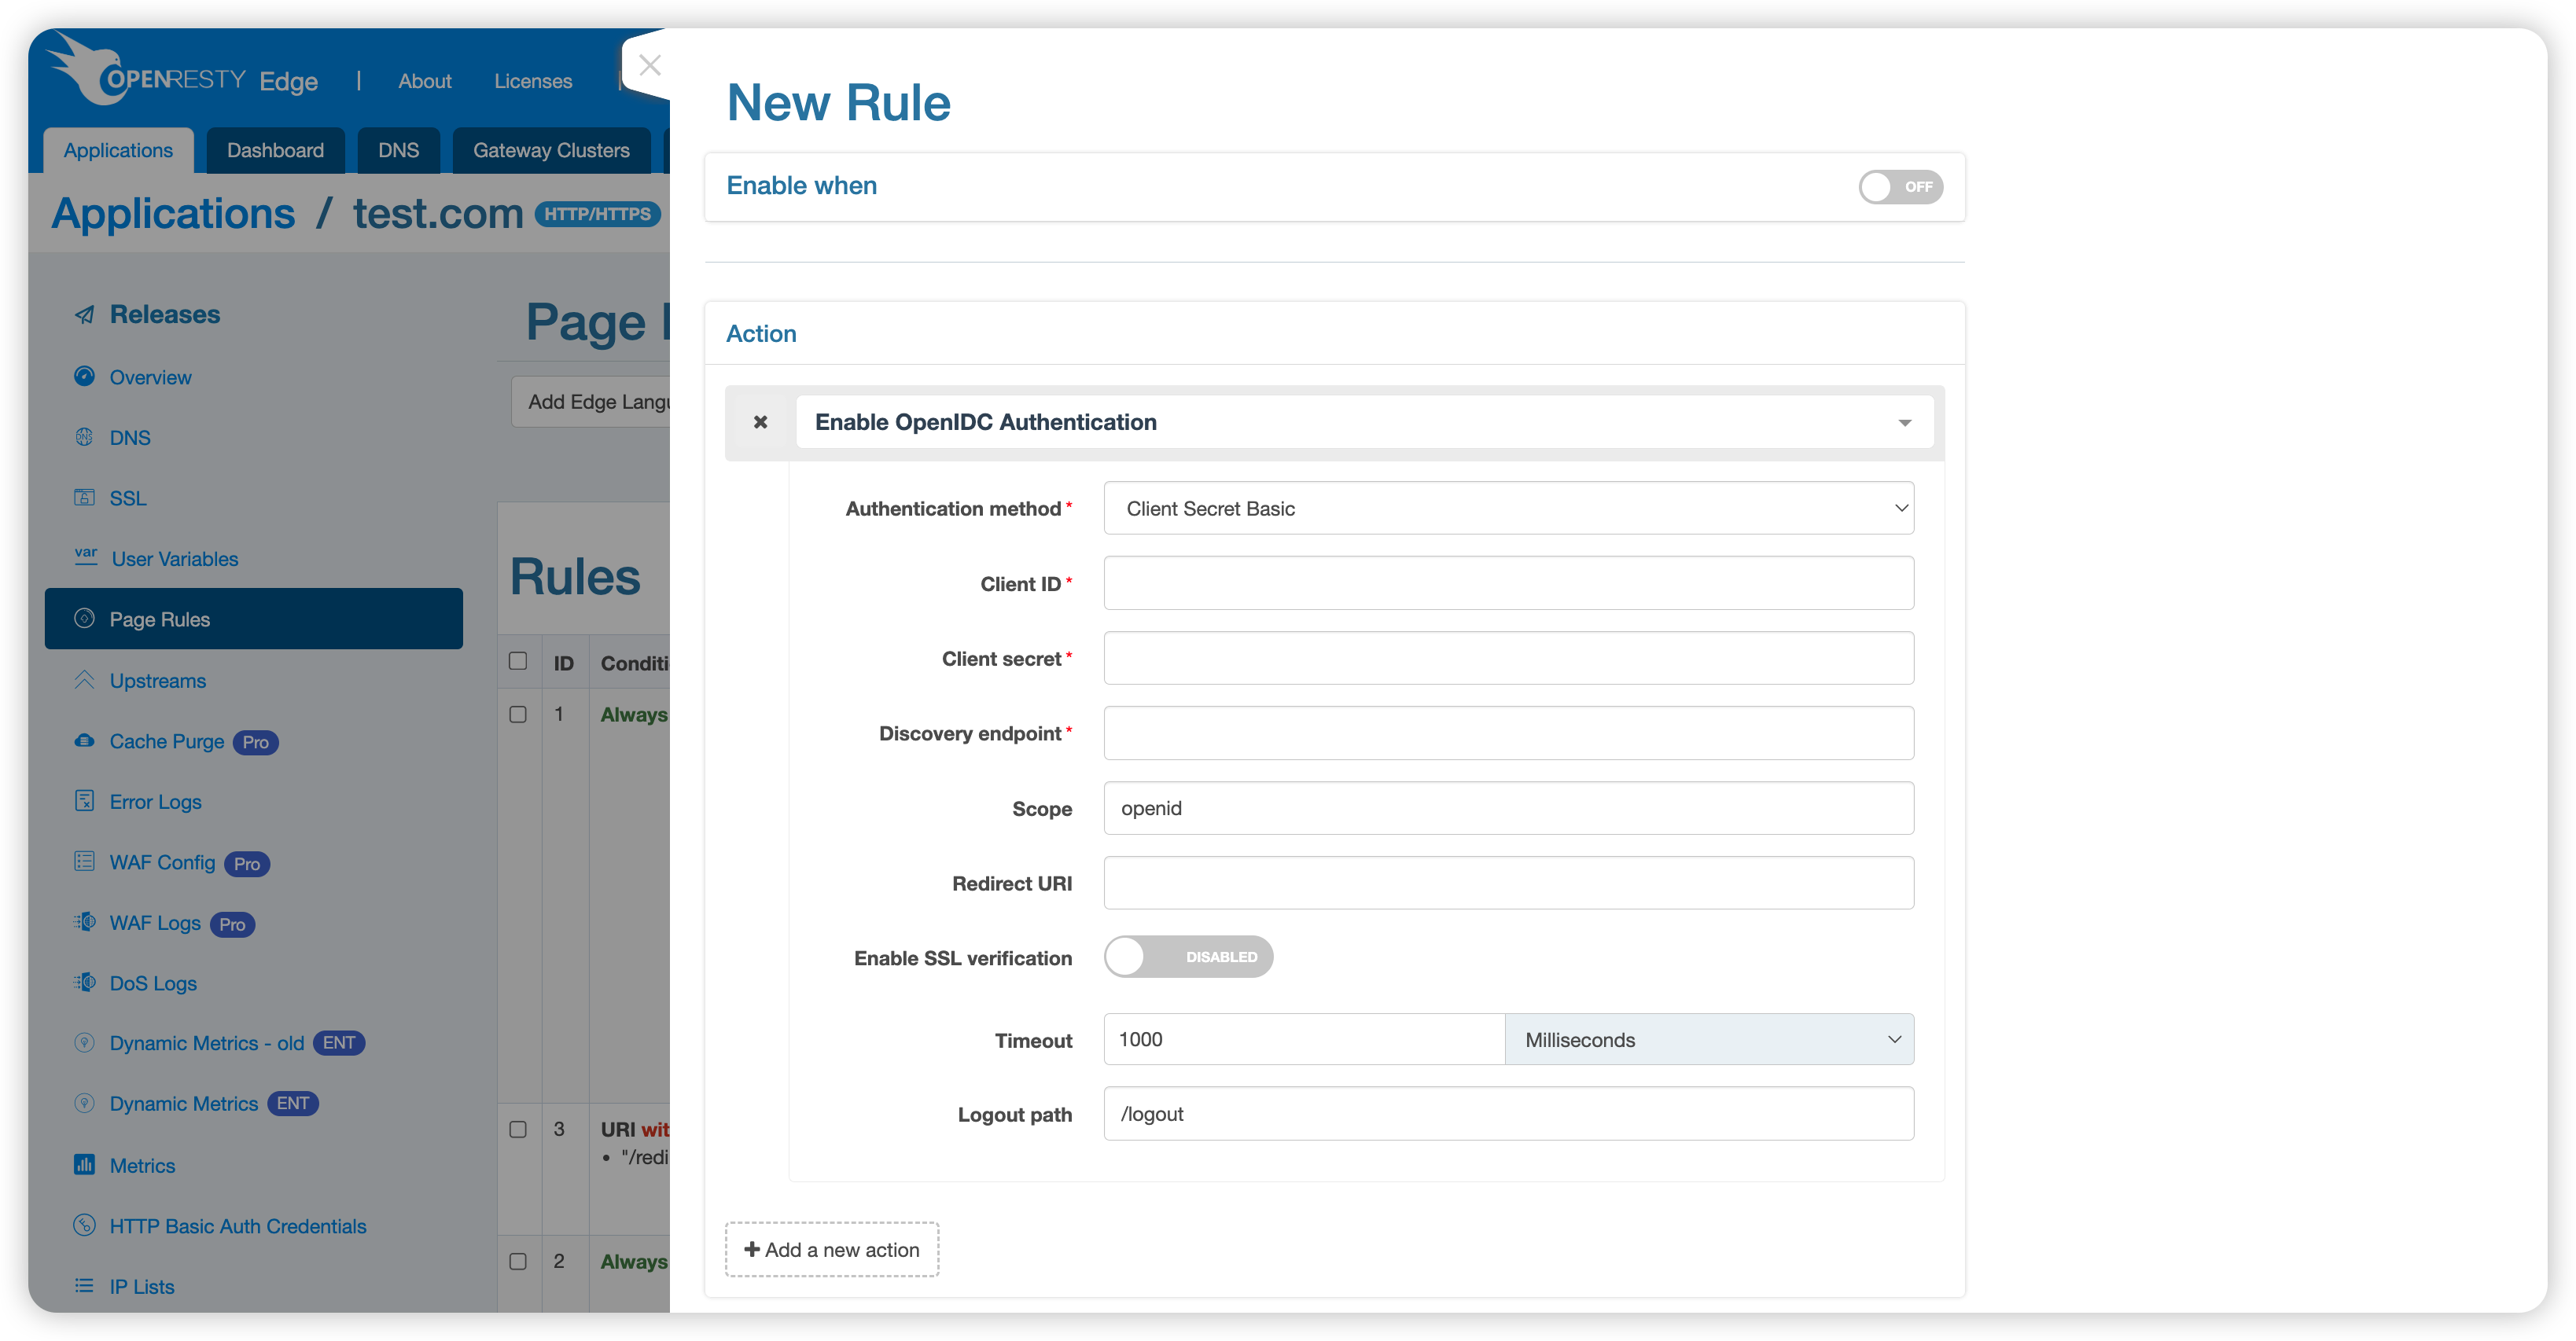
Configuration Parameters
| Parameter | Description |
|---|---|
| Authentication Method | Currently supports three methods: client_secret_basic, client_secret_post, and client_secret_jwt |
| Client ID | Client identity, obtained from the Identity Provider (IdP) |
| Client Secret | Client key, obtained from the Identity Provider (IdP) |
| Discovery Endpoint | URL provided by the Identity Provider (IdP) to obtain the OpenID protocol specifications supported by the service |
| Scope | Client permissions, must include OpenID, common values are openid email profile |
| Redirect URI | The address to redirect to after successful authentication, supports relative and absolute addresses, can be left empty (defaults to the original request URL), typically needs to match the configuration in the Identity Provider (IdP) |
| Enable SSL Verification | Whether OpenResty Edge™ uses encrypted connections with the Identity Provider (IdP) |
| Timeout | Connection timeout between OpenResty Edge™ and the Identity Provider (IdP), in milliseconds |
| Logout Path | Requesting domain + logout path can log out from the Identity Provider (IdP), requiring re-login for subsequent authentication, common value is /logout |
Practical Application Example
The following example demonstrates how to configure and use OpenIDC authentication with Auth0.
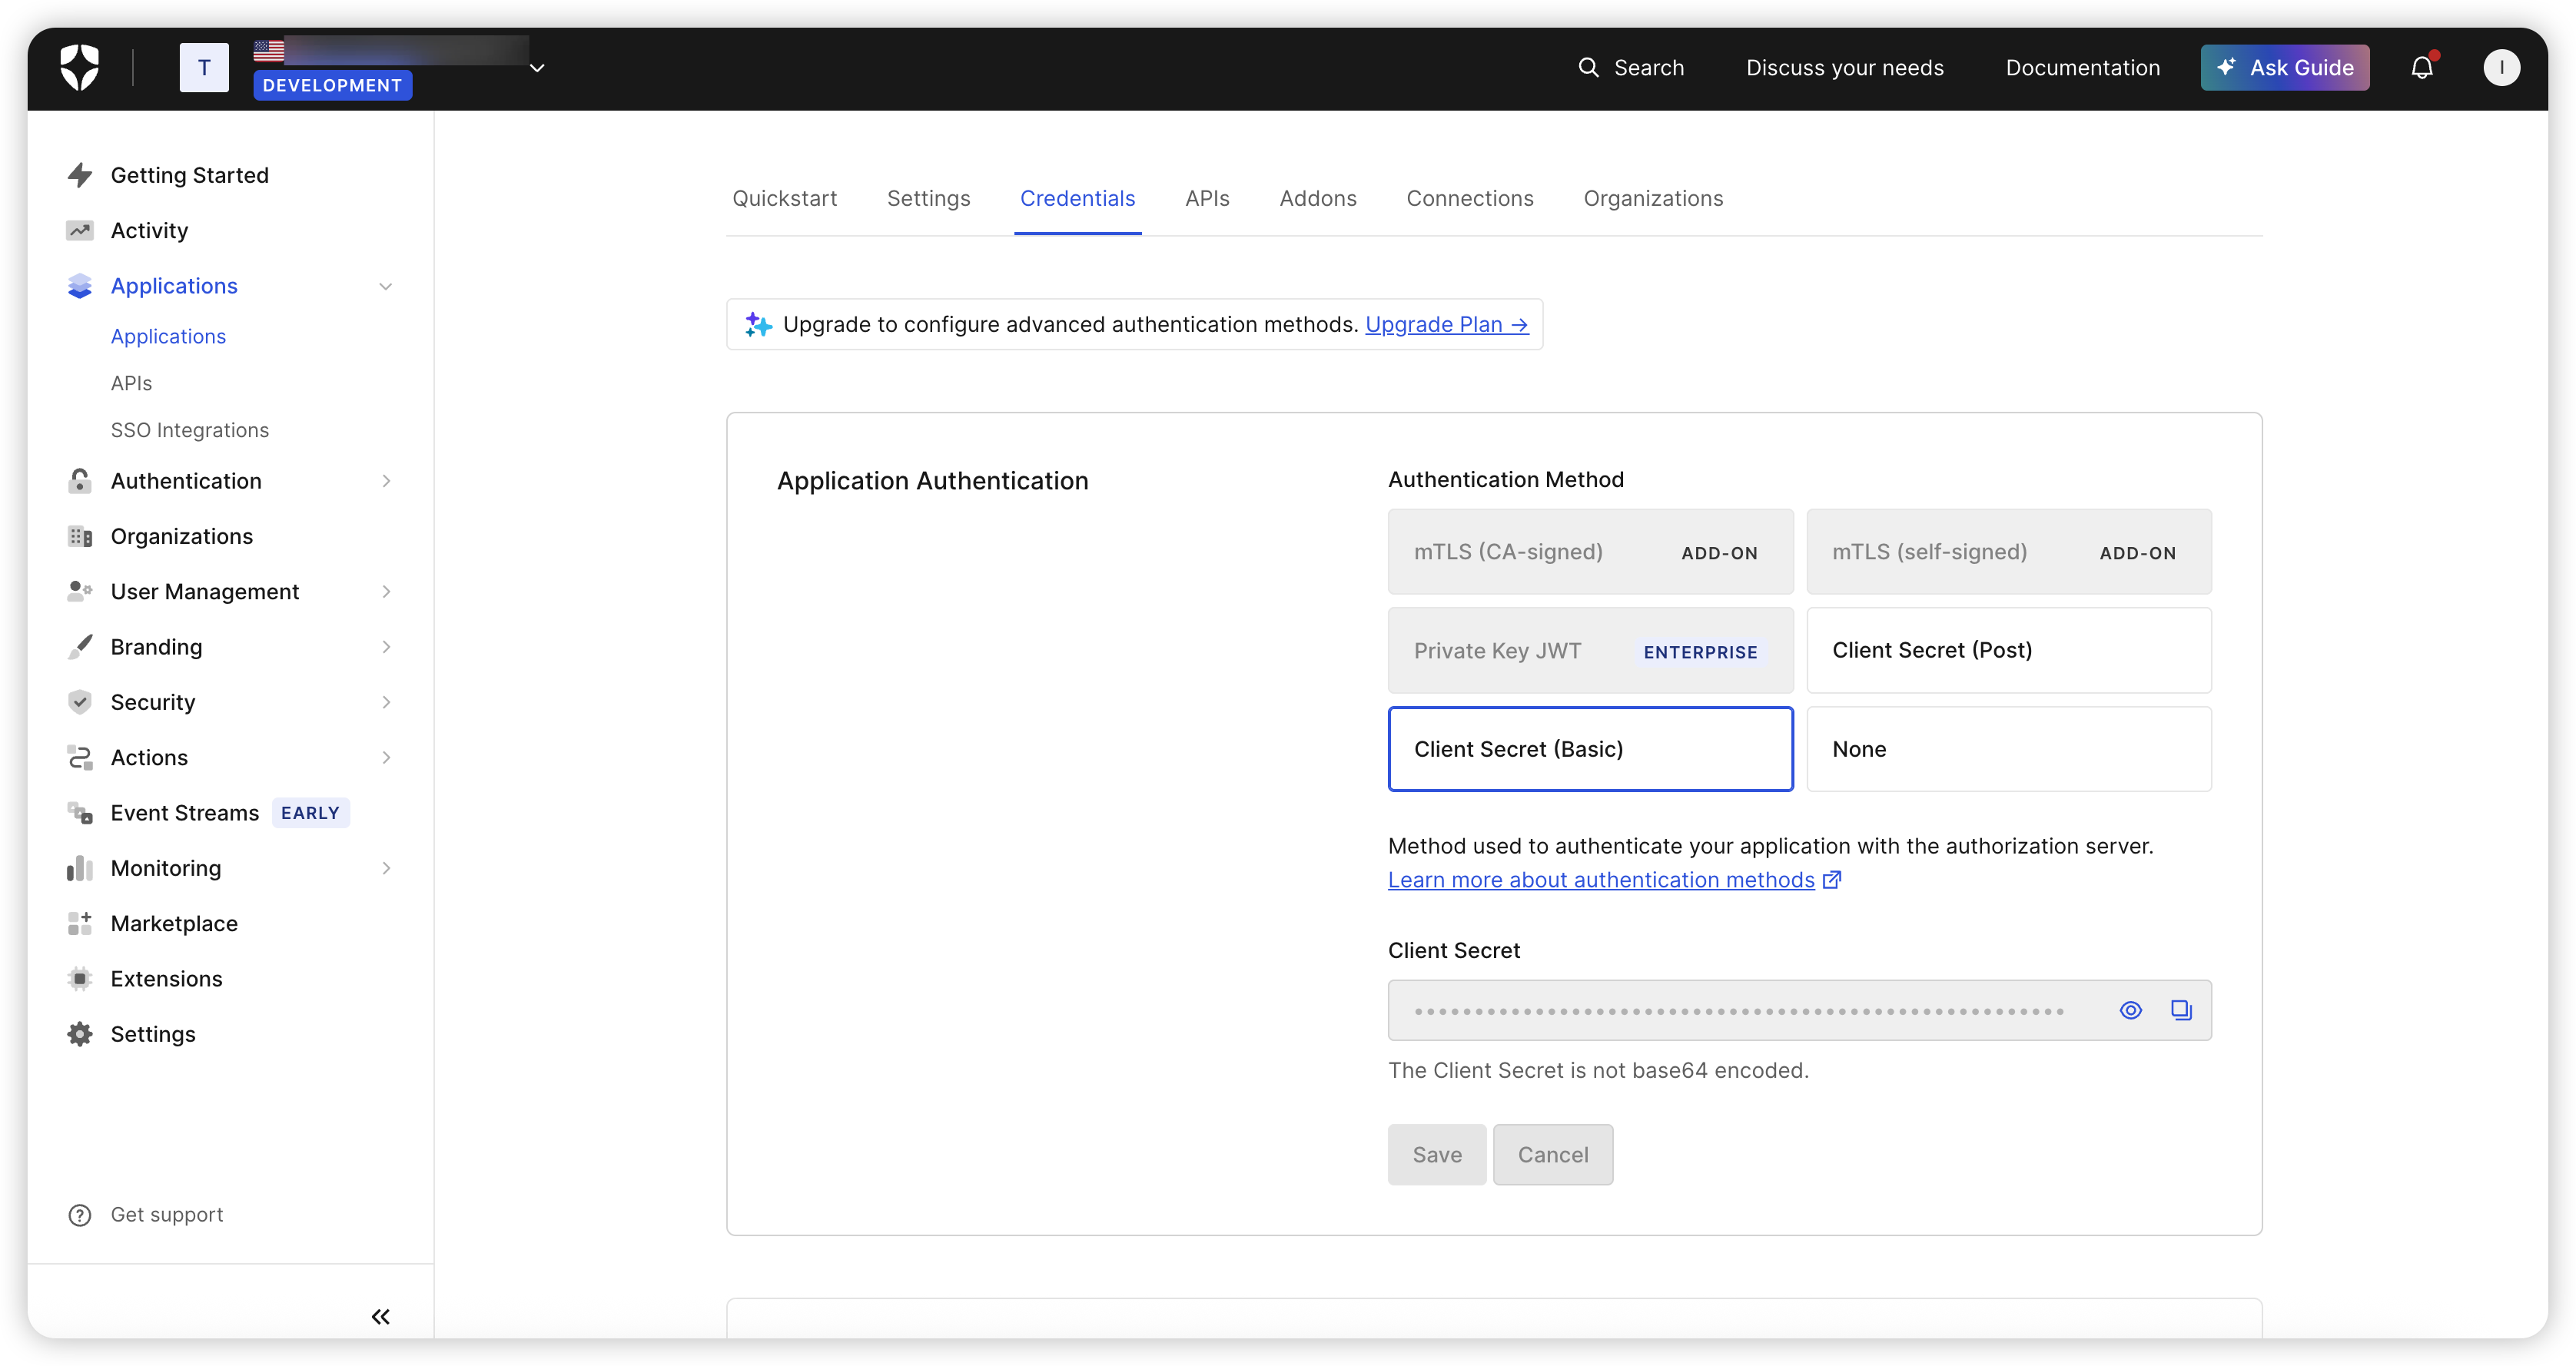
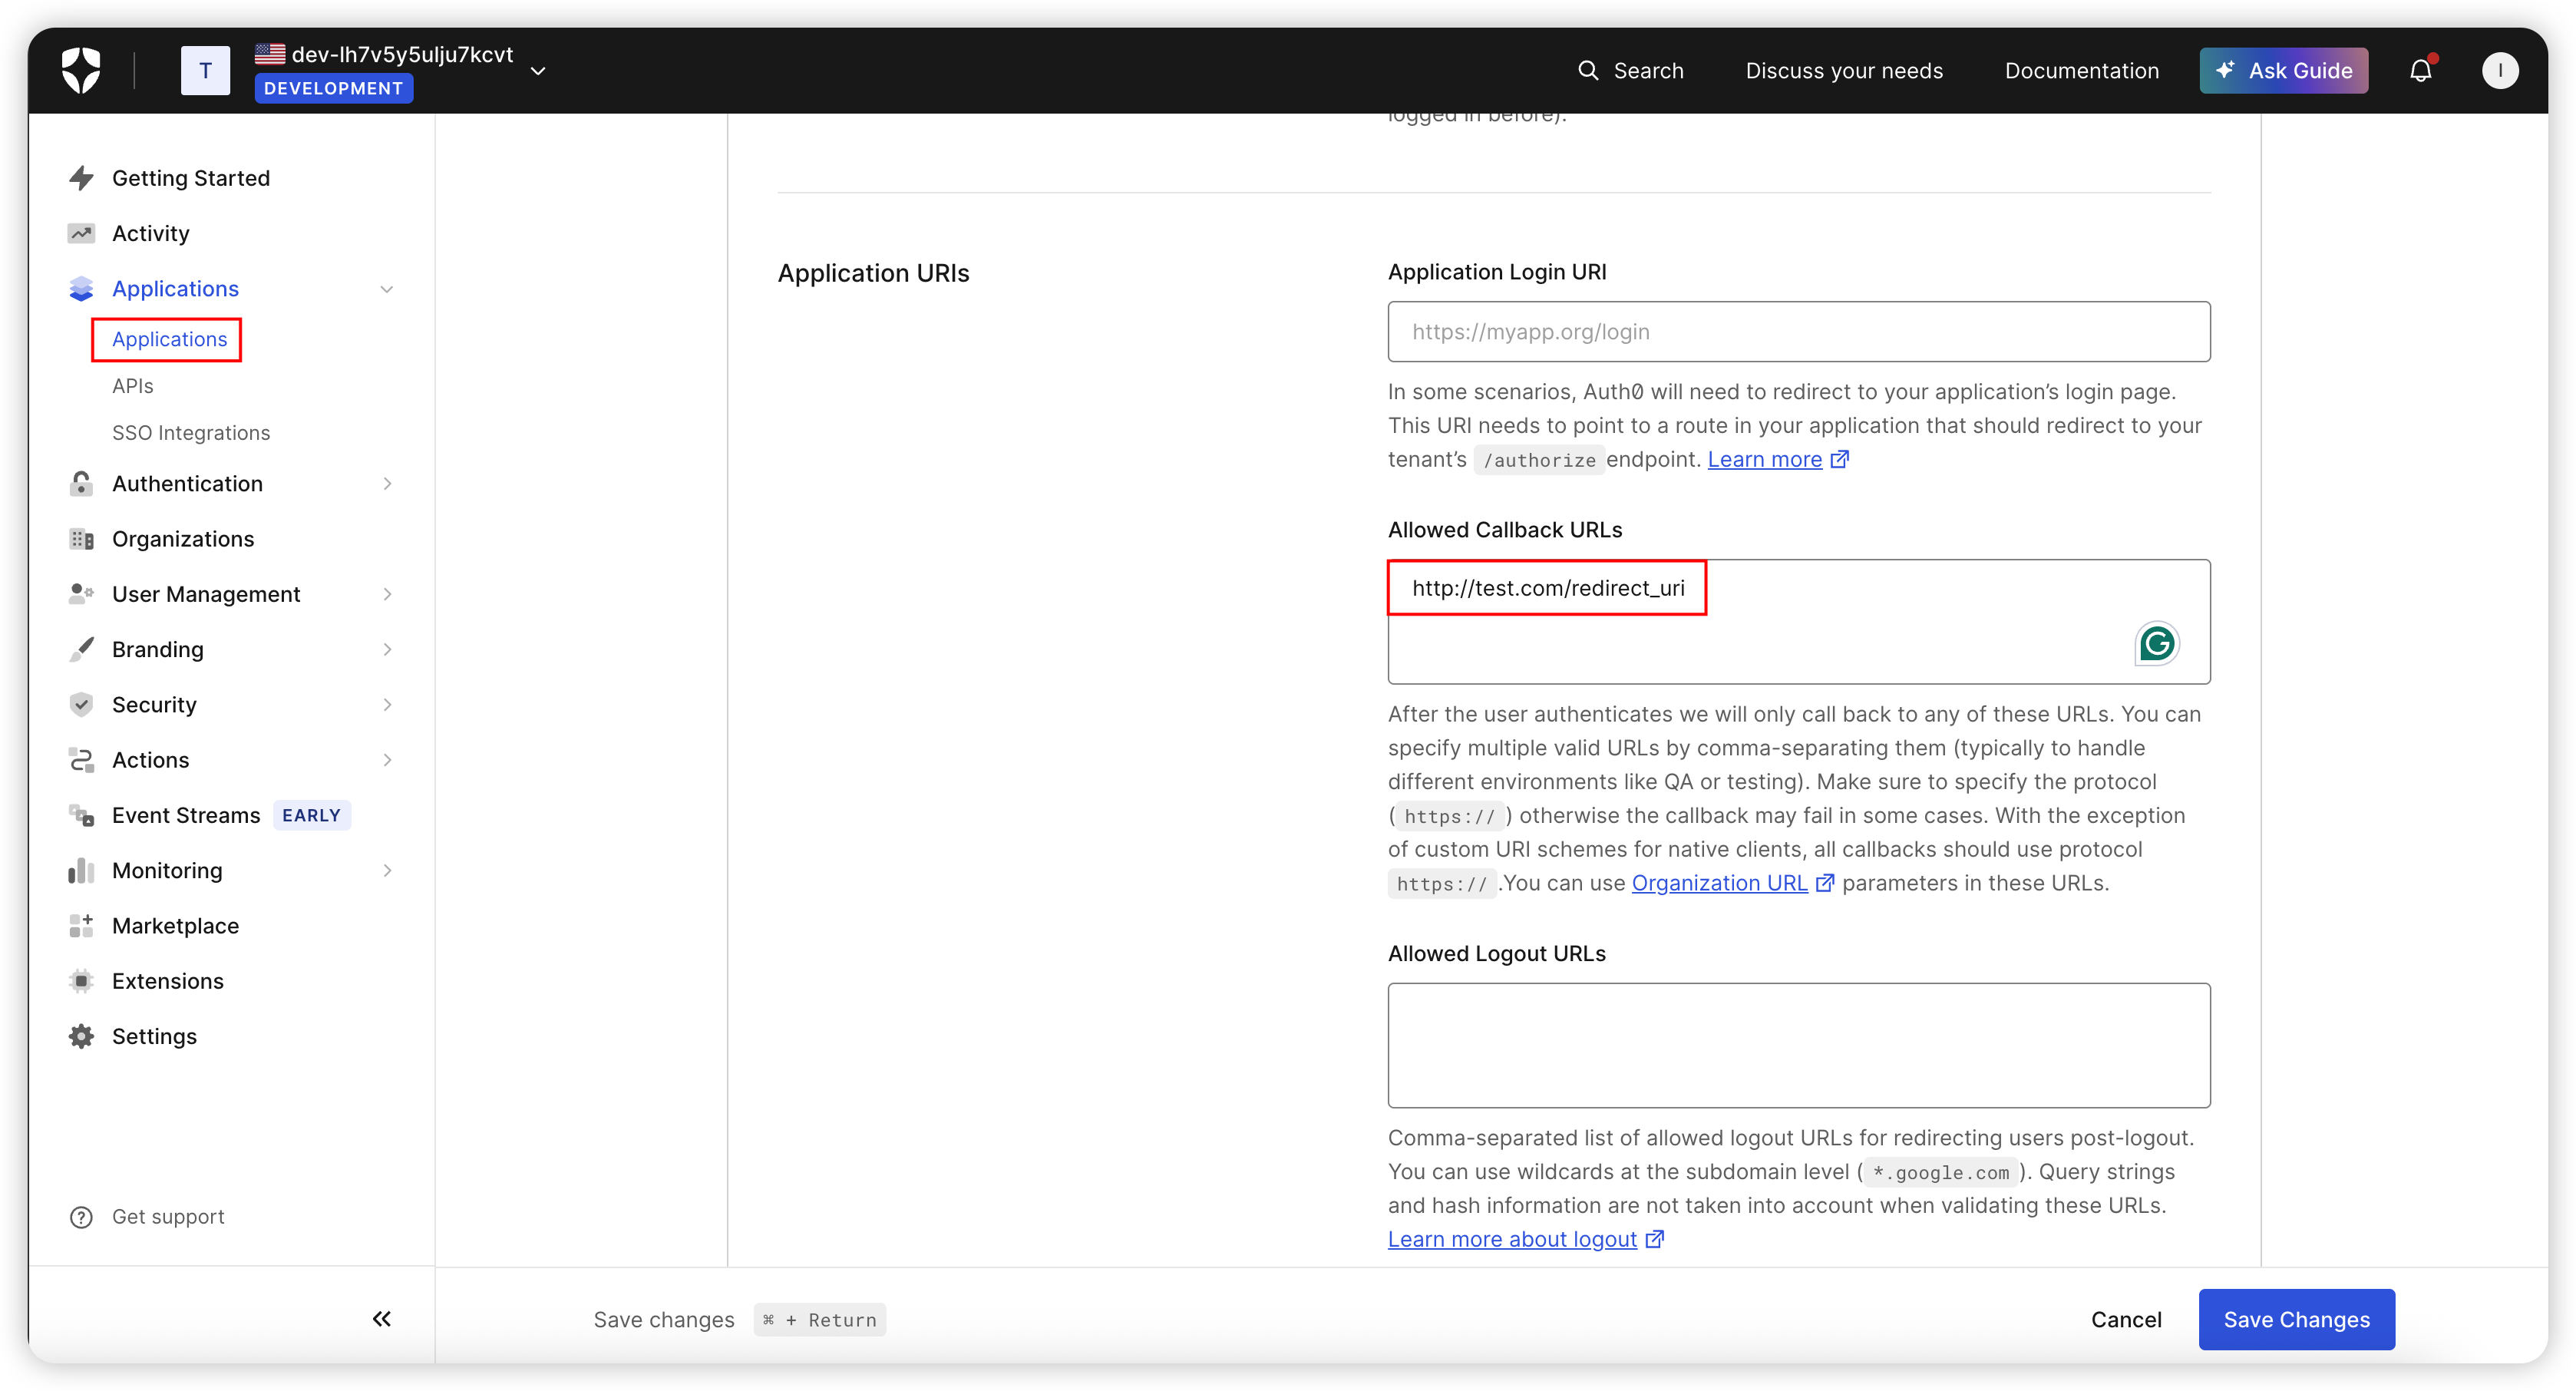
Step 1: Configure in Auth0
Configure authentication information and redirect_uri in the Auth0 dashboard:
Step 2: Configure OpenIDC Authentication in Edge
Enable OpenIDC authentication in Edge and enter the information obtained from Auth0:
Step 3: Add Redirect Rule
After enabling the OpenIDC authentication rule, add a redirect_uri related rule to handle actions when authentication fails or when directly accessing the redirect_uri:
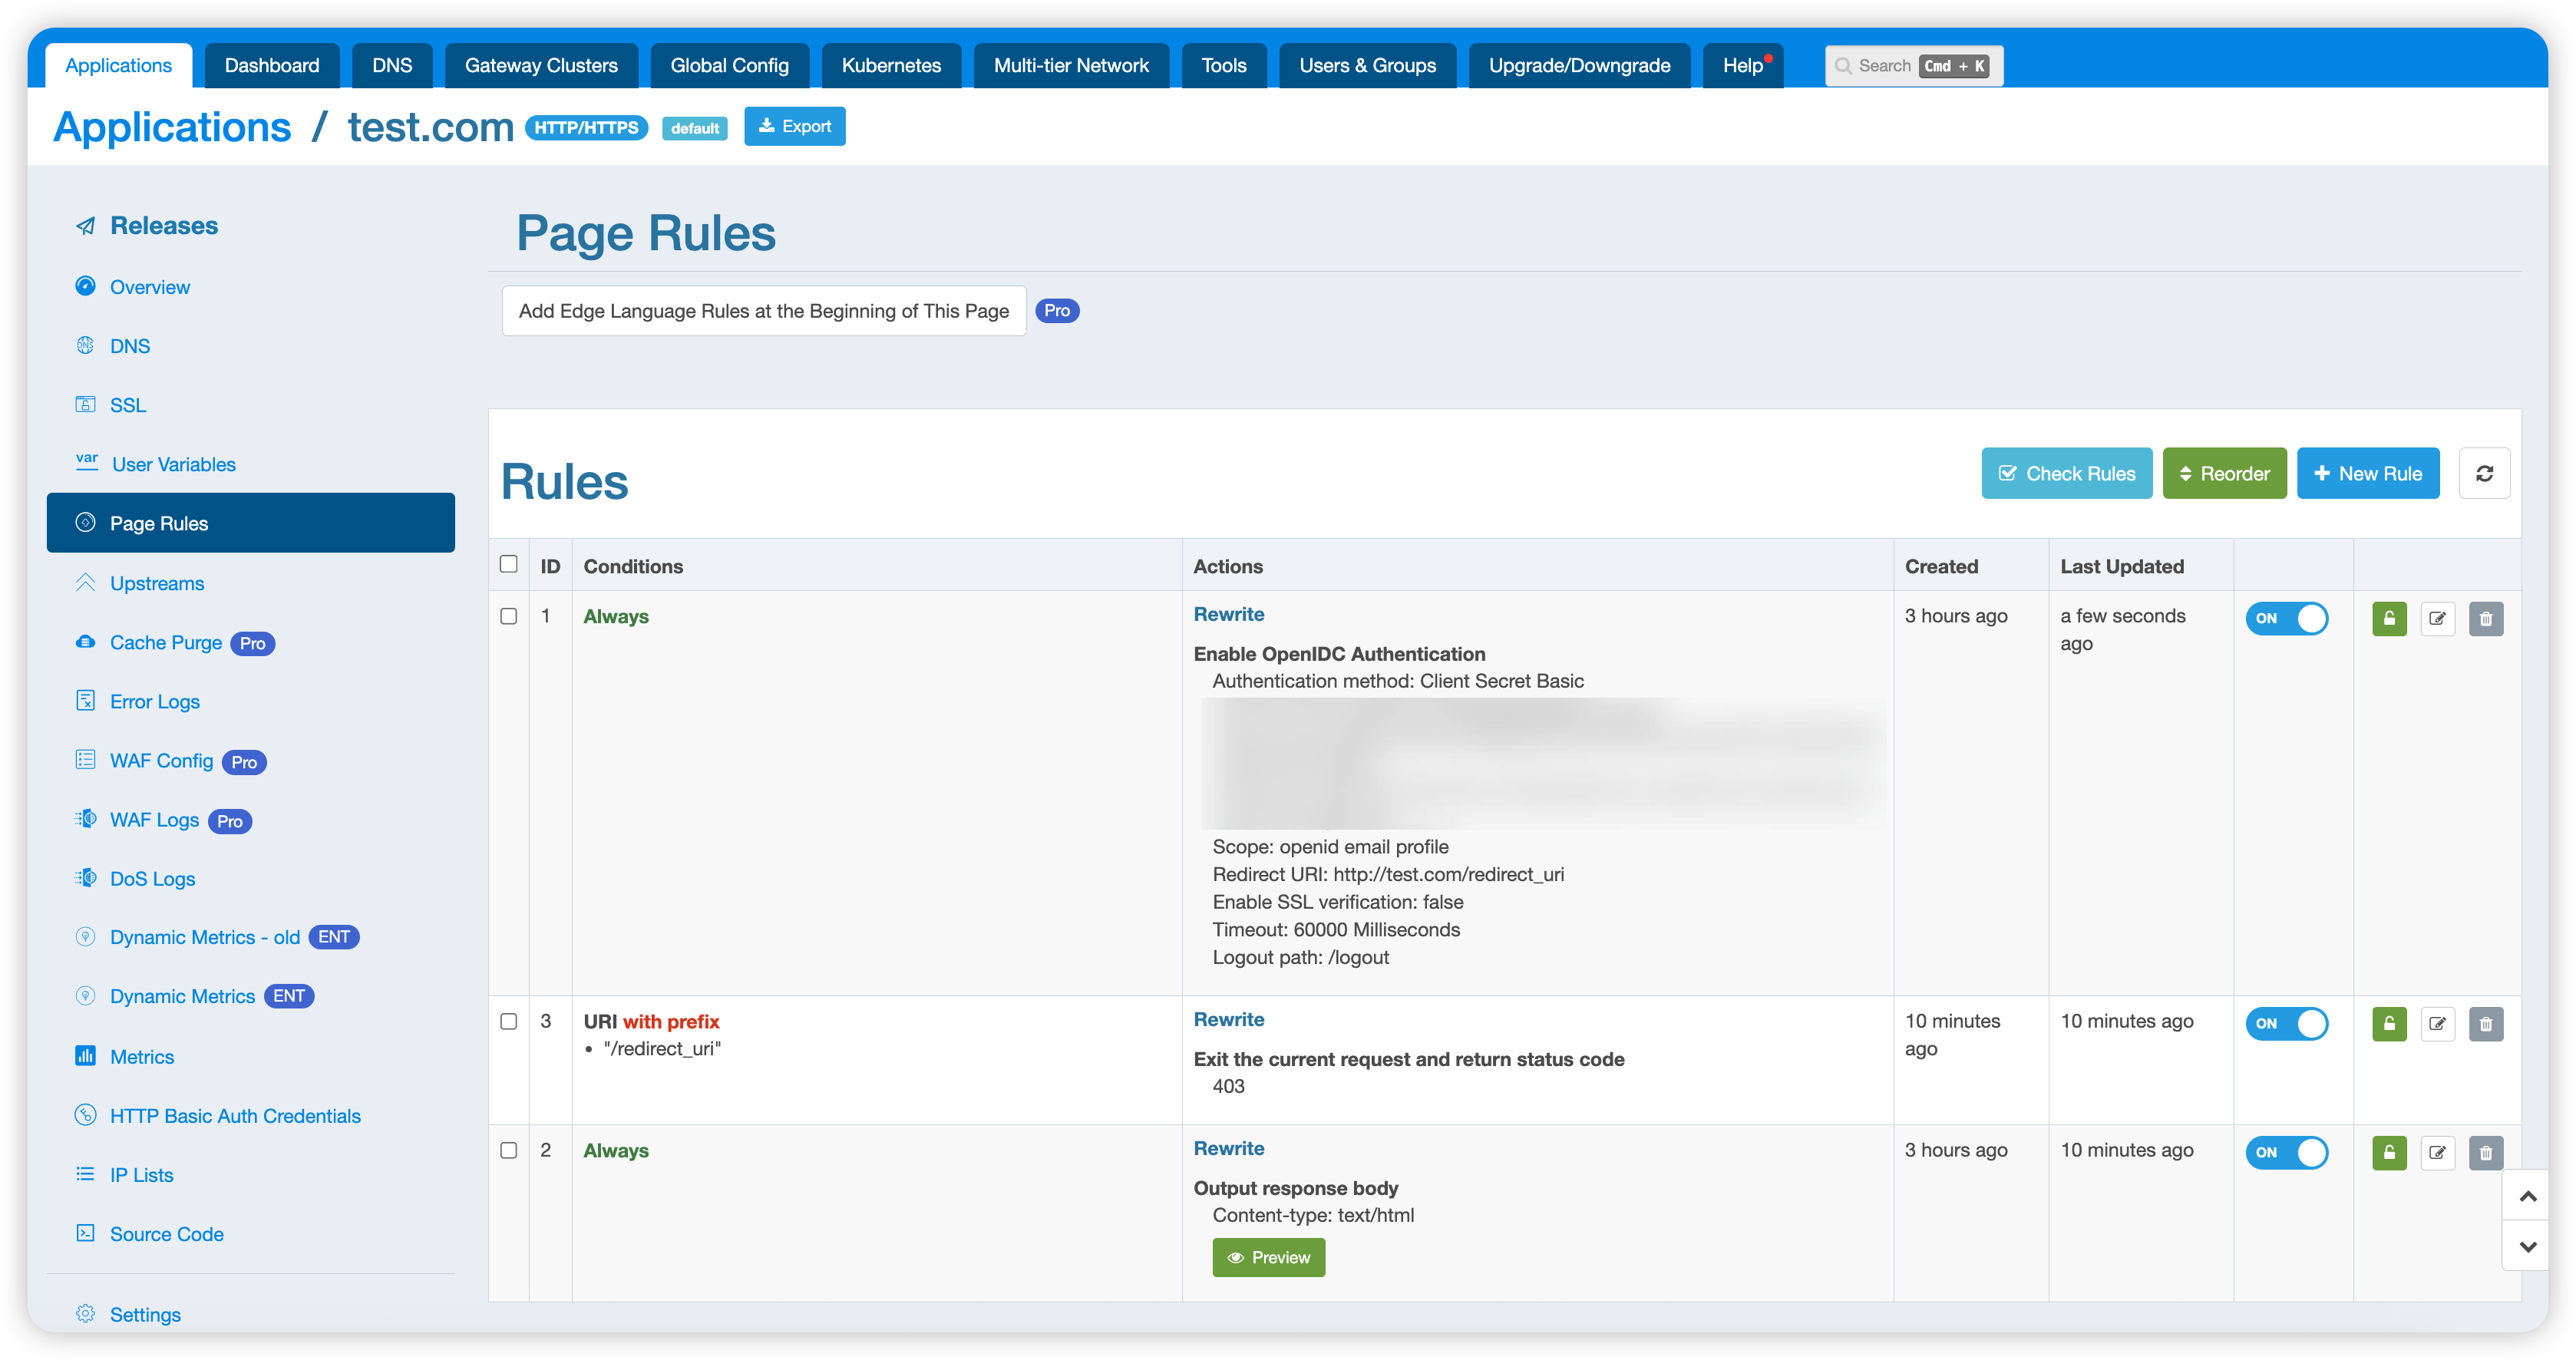
After these two rules, you can add other normal business rules. In this example, the last rule prints Hello World.
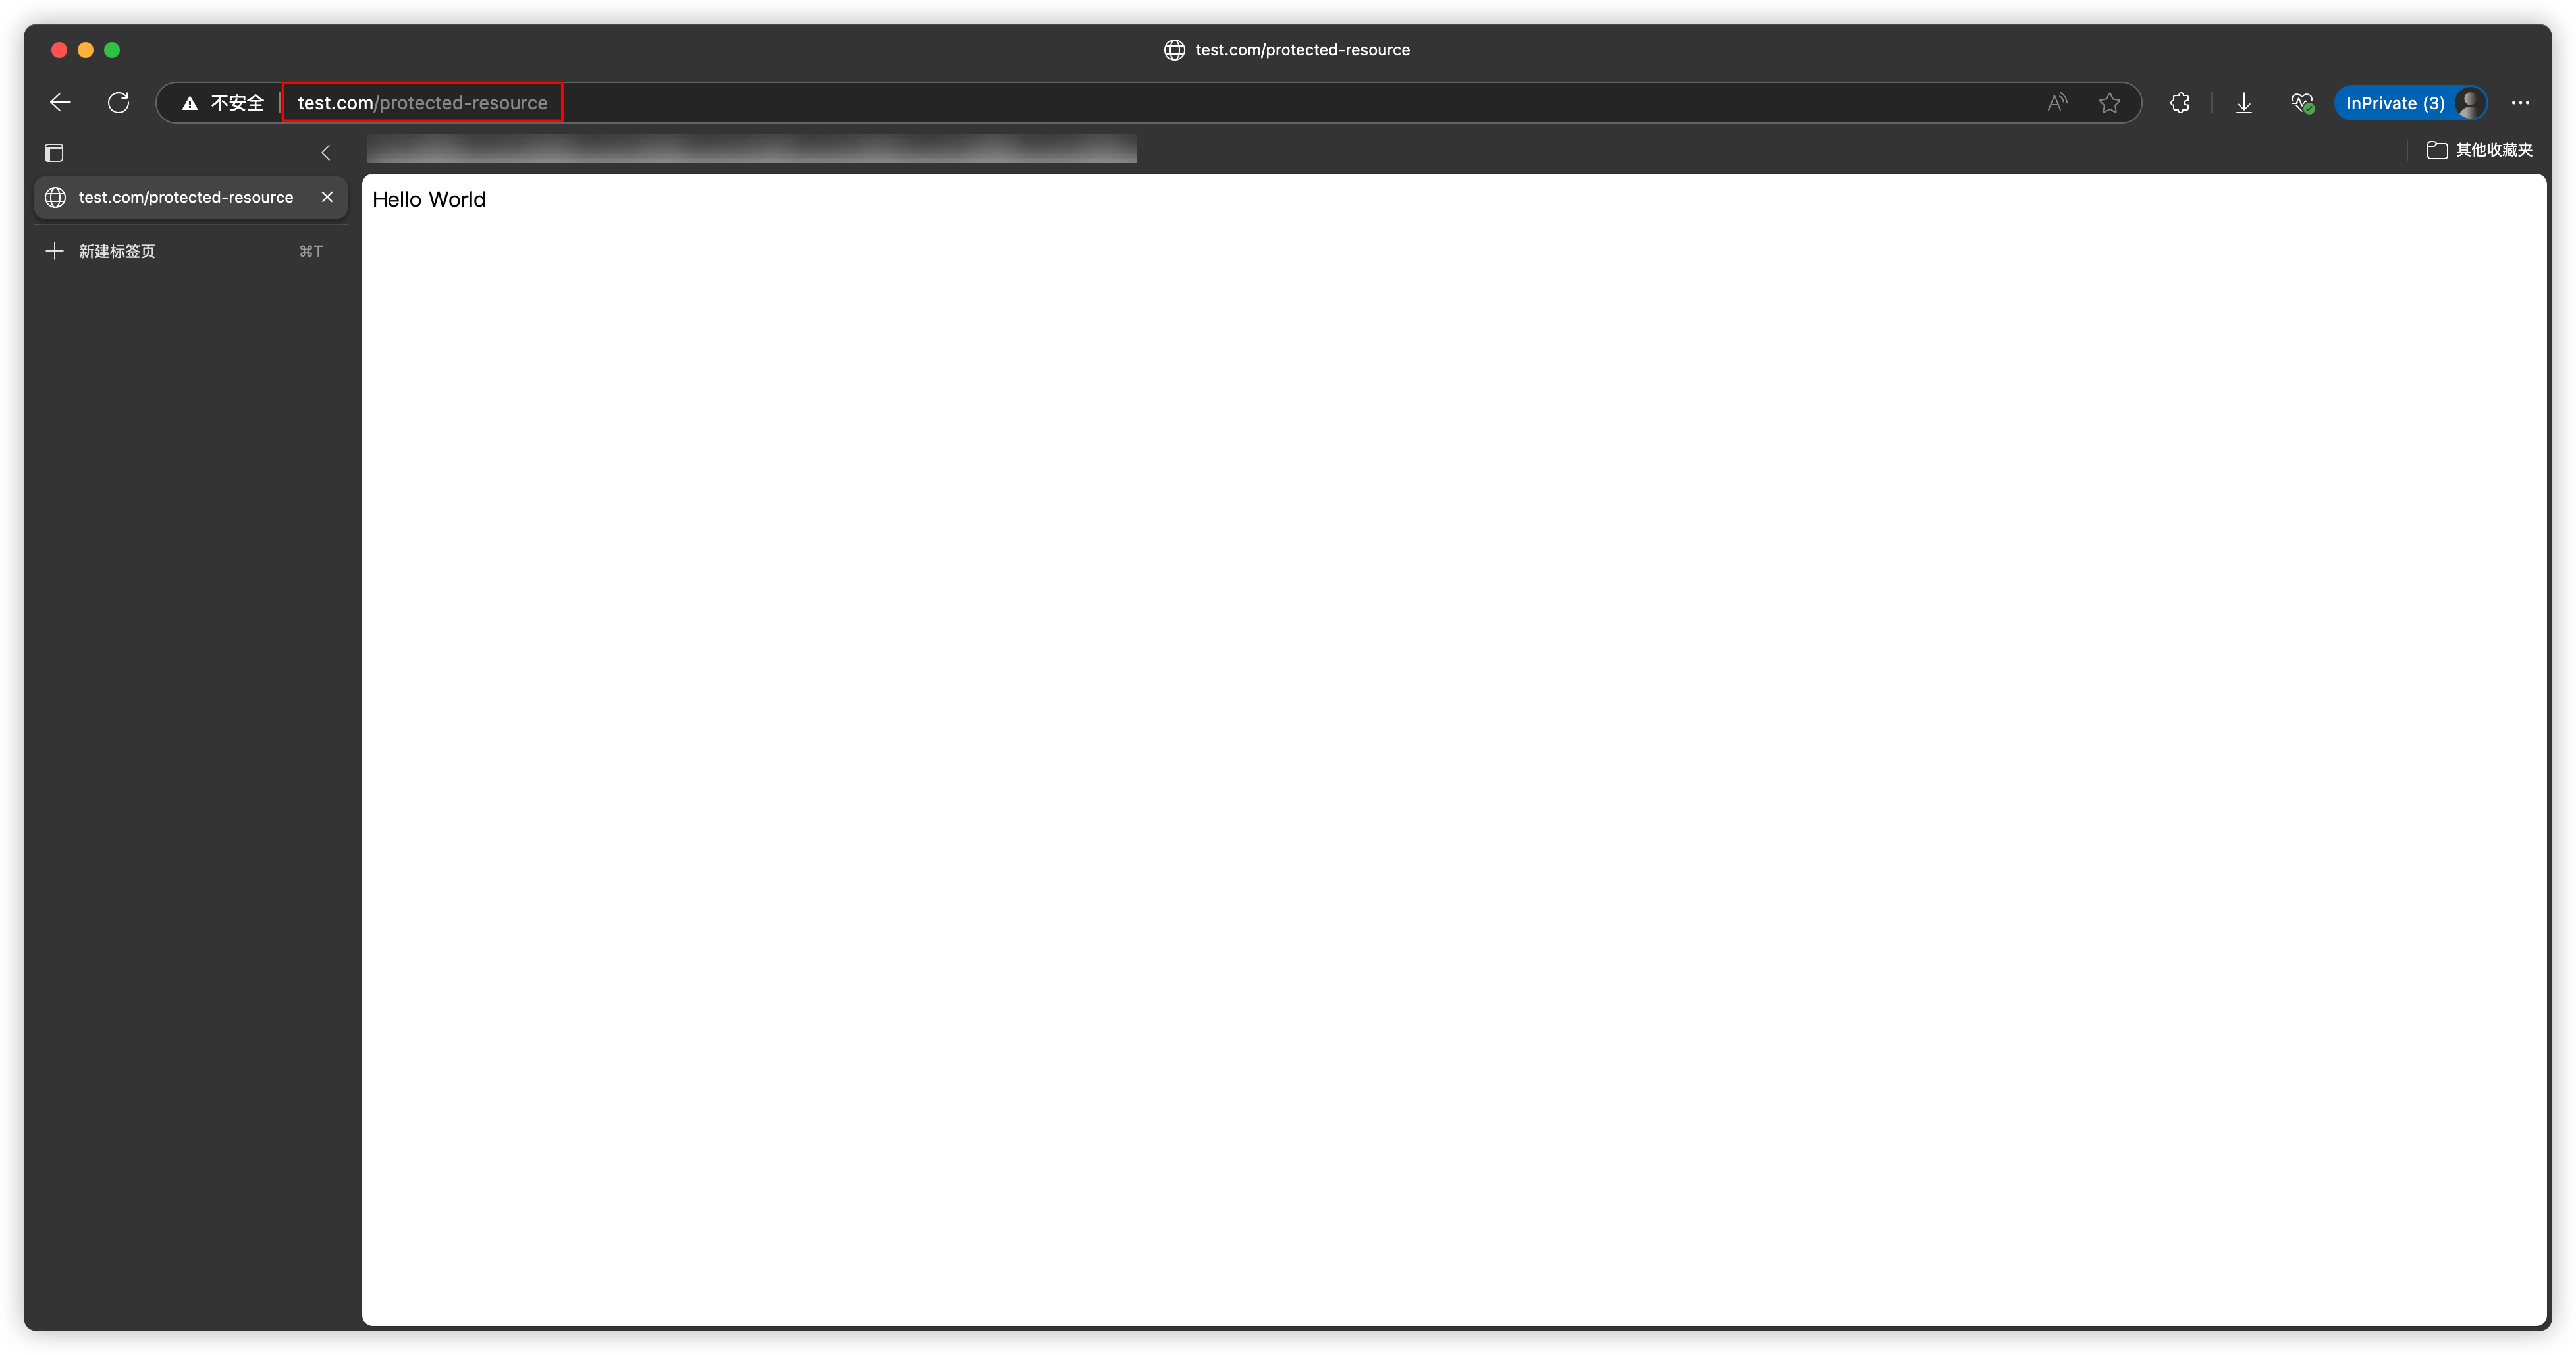
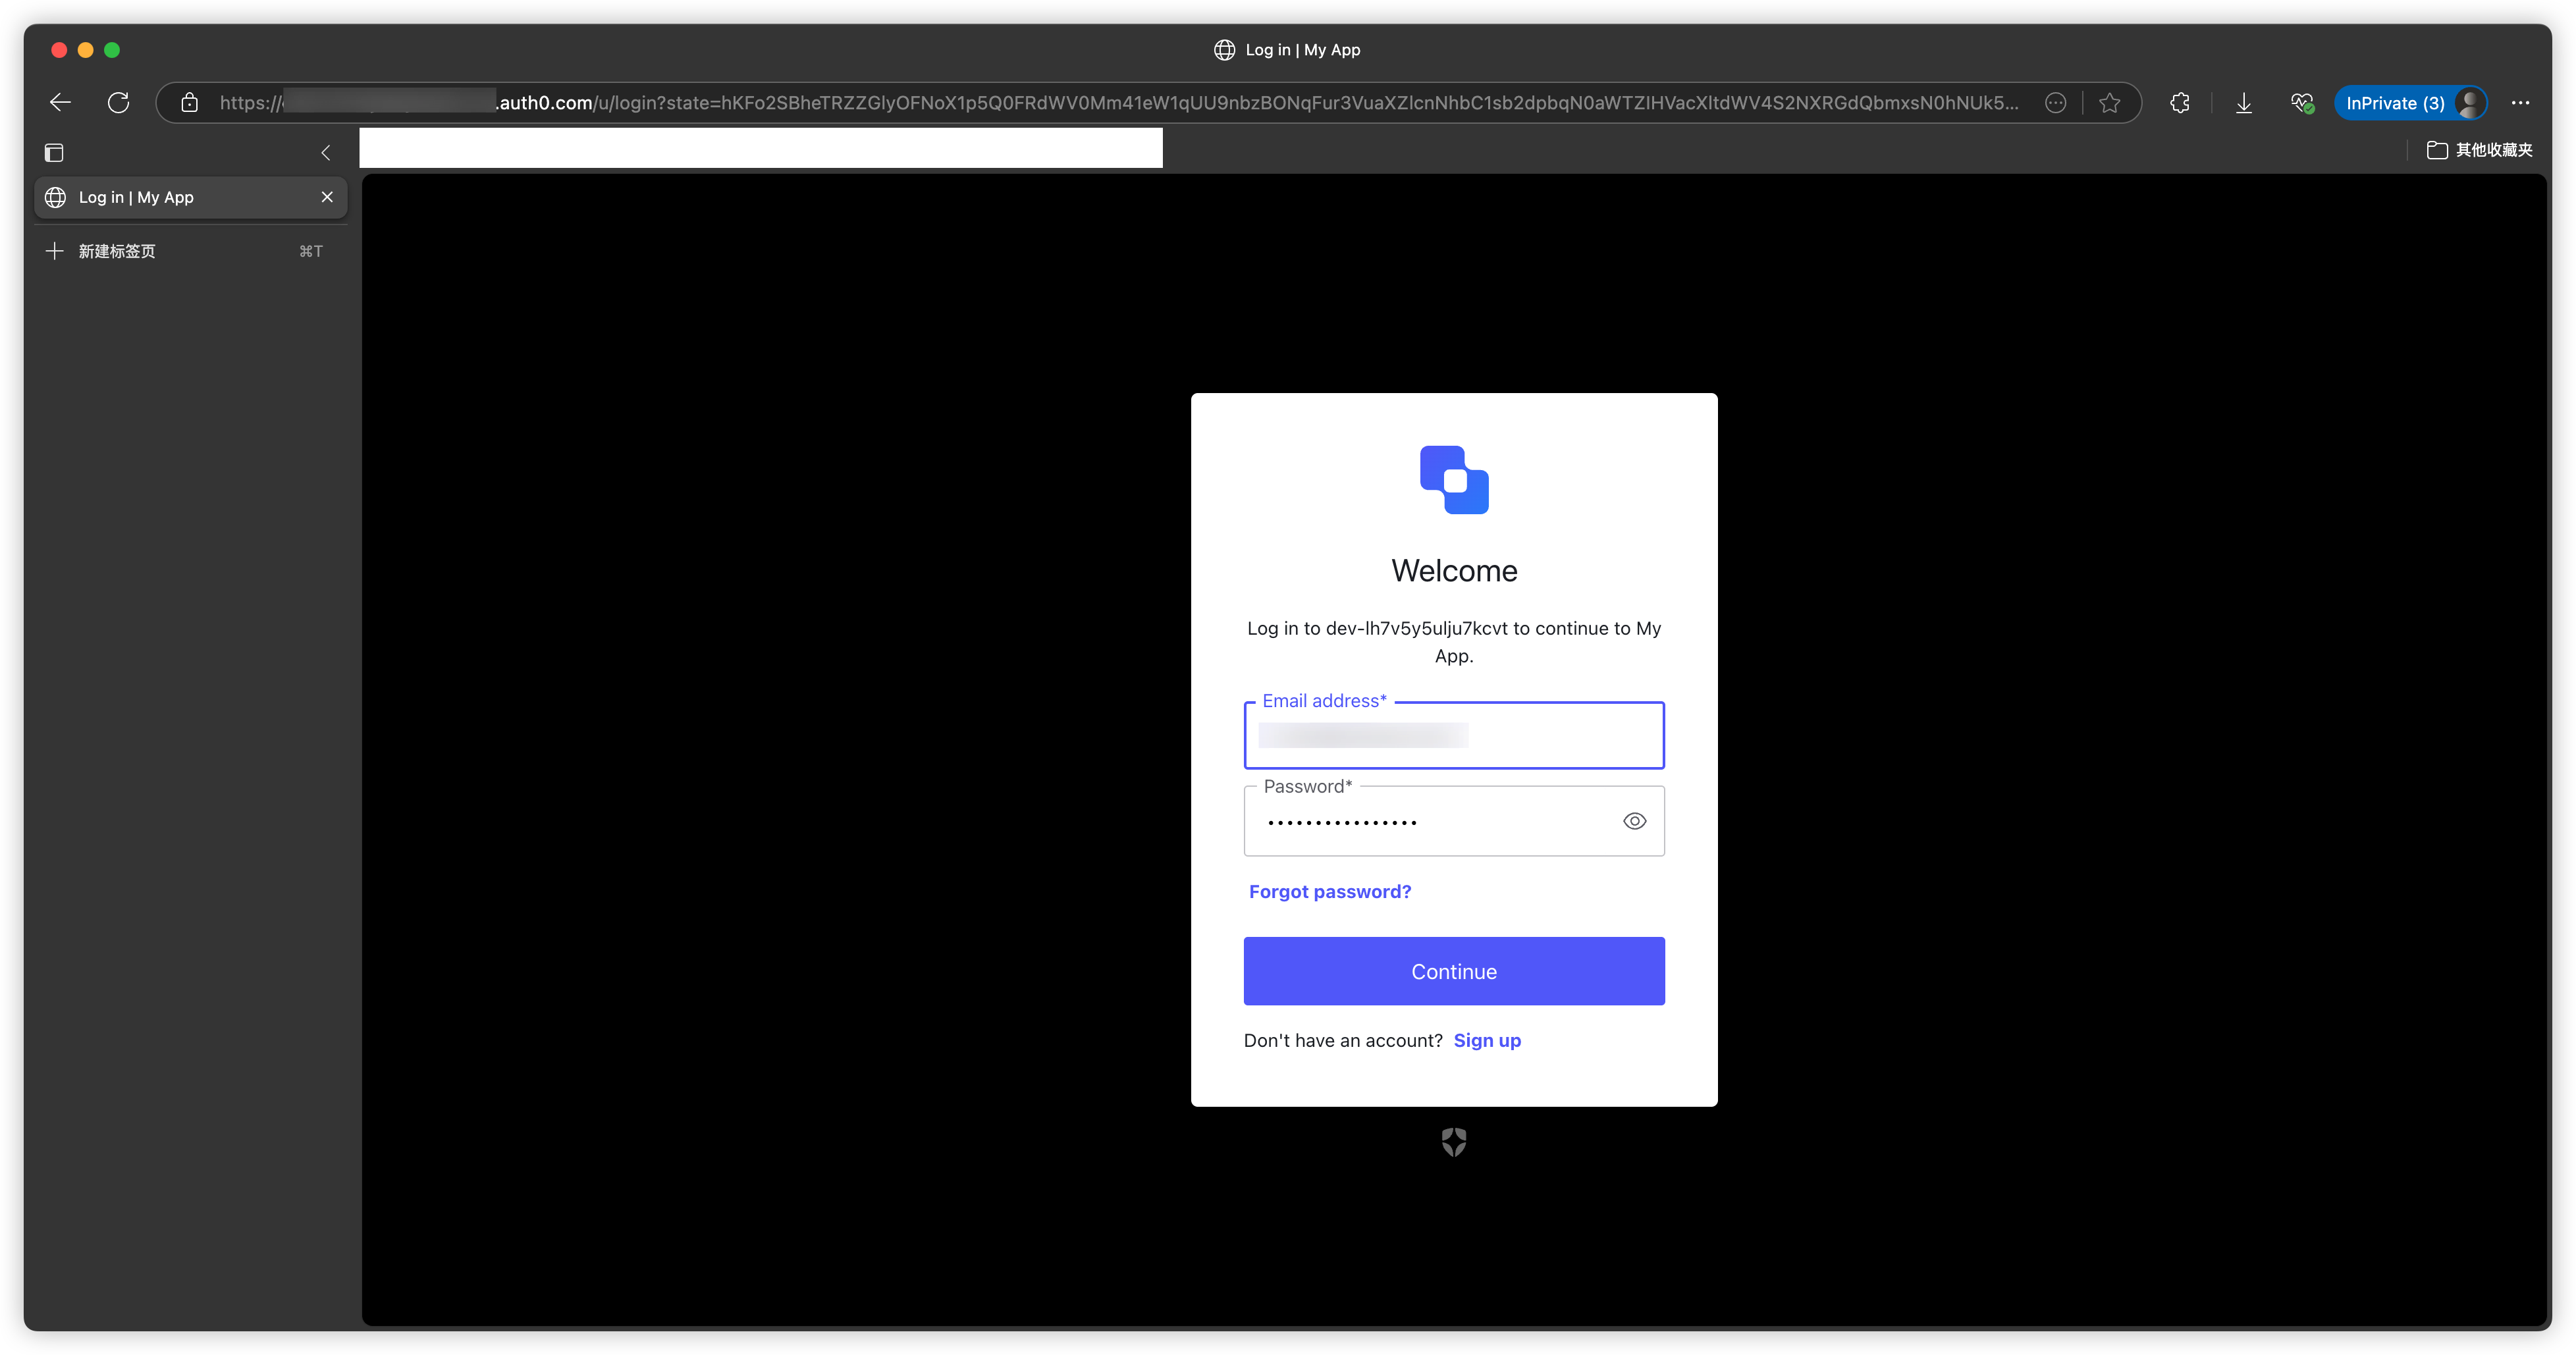
Step 4: Test the Authentication Flow
When accessing /protected-resource, you will be redirected to the Auth0 login interface:
After successful login, the system will redirect back to /protected-resource and successfully access it: