OpenID Connect
The on-premise edition of OpenResty XRay supports integration with third-party identity authentication and authorization services through the OpenID Connect (OIDC) protocol to implement Single Sign-On (SSO) functionality.
This document provides detailed instructions on how to configure OpenID Connect third-party identity authentication.
Adding an OIDC Identity Provider
Click on the username in the top-right corner to access the OpenIDC Providers page:

Click the Add OpenIDC Provider button to start configuring a new OIDC identity provider.
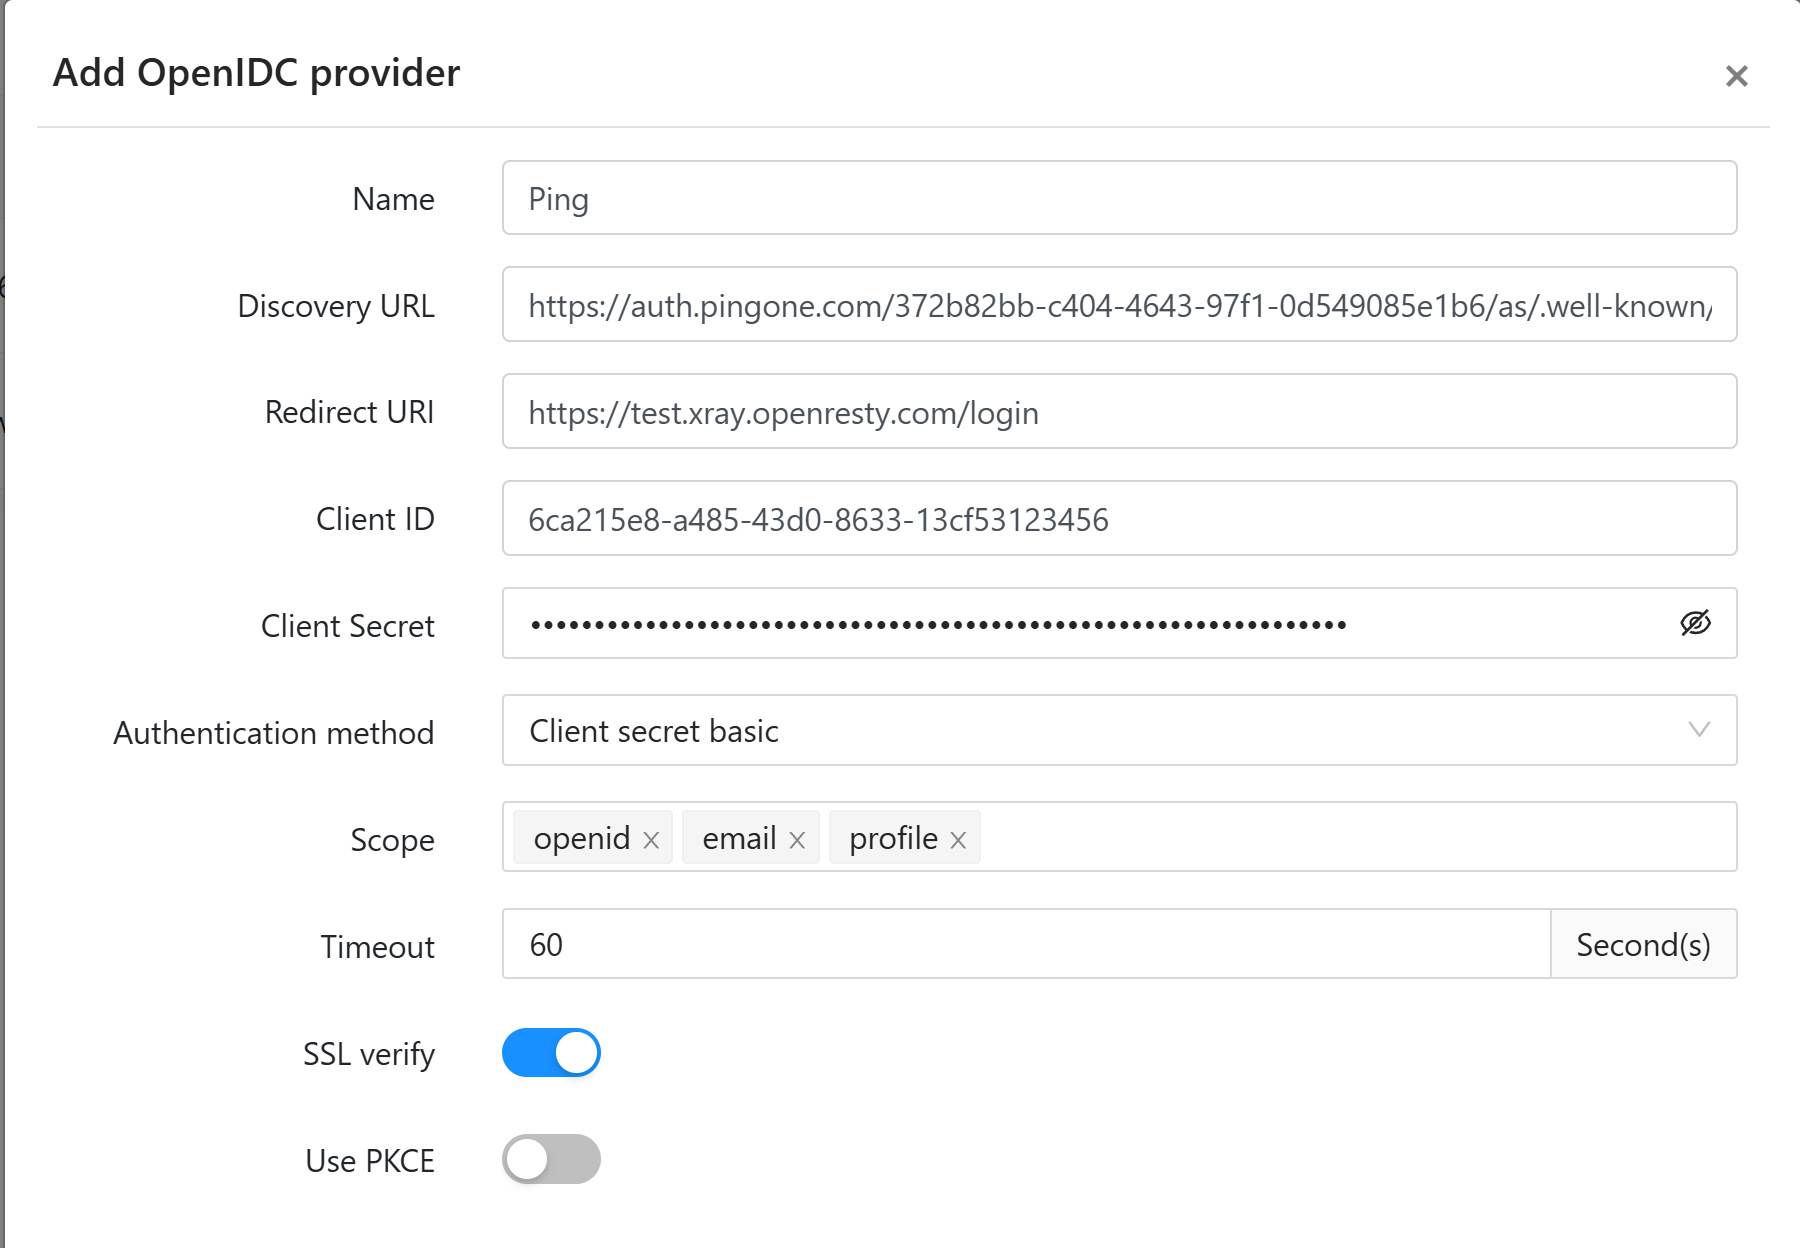
- Name: Display name for the OIDC identity provider, which will generate a corresponding login button on the login interface. A short and readable name is recommended.
- Discovery URL: OIDC service discovery endpoint URL used to automatically retrieve the identity provider’s configuration information, typically
https://EXAMPLE.com/.well-known/openid-configuration. - Redirect URI: Callback address after successful authentication, used by OpenResty XRay to receive the authorization code and complete the login process. The system will automatically populate a default value, which can be adjusted based on actual deployment conditions.
- Client ID: Client application identifier registered with the OIDC identity provider.
- Client Secret: Client authentication secret, required when the authentication method is set to
Client secret basicorClient secret post. - Authentication Method: Client authentication method, supporting three options:
Client secret basic,Client secret post, andPrivate key JWT. - Authorization Scope: Requested permission scope.
emailis required because OpenResty XRay uses email addresses to associate OIDC accounts with local user accounts. (If there are resource restrictions, please allow the return ofemailresources) - Timeout: Timeout for communication with the OIDC identity provider, default is 60 seconds.
- SSL Verification: Whether to verify the SSL certificate of the OIDC identity provider. Enabled by default, and it is strongly recommended to keep it enabled for security.
- Use PKCE: Enable PKCE (Proof Key for Code Exchange) extension, which is a mechanism to enhance the security of the authorization code flow. If the identity provider supports it, enabling this option is recommended.
Binding User Accounts
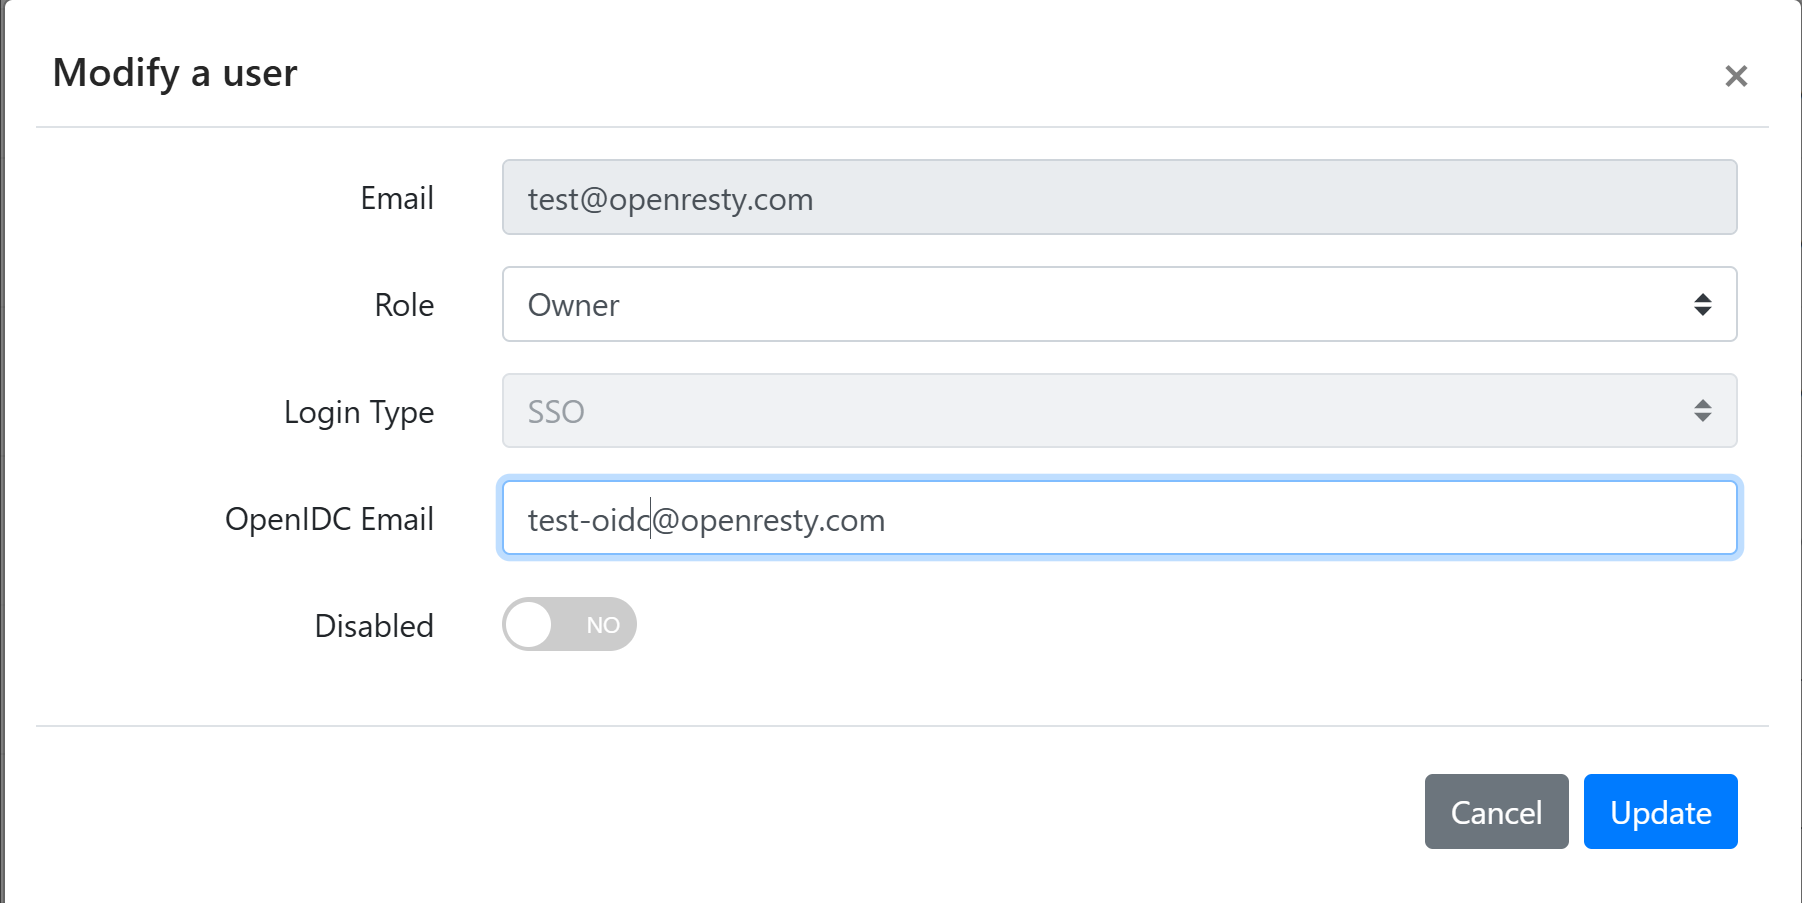
After configuring the OIDC identity provider, if the username and OIDC email address are inconsistent, you need to use an administrator account to associate the OpenResty XRay local user account with the OIDC account.
- Click on the username in the top-right corner to access the Manage Users page:

- Bind OIDC account:
Enter the OIDC Email Address to complete account binding. This email address must match the email address returned by the OIDC identity provider.
Using OIDC Login
After completing account binding, you can log in to OpenResty XRay through the OIDC identity provider:

Click the corresponding identity provider login button (such as ping), and the system will redirect to that identity provider’s login page. After completing authentication with the identity provider, it will automatically redirect back to OpenResty XRay and complete the login process.